hacklink hack forum hacklink film izle hacklink marsbahisizmir escortsahabetpornJojobetcasibompadişahbetBakırköy Escortcasibom9018betgit casinojojobet

Tag: Curry

  • Beginner Cook Or A Bachelor – Everyone Can Make Perfect Chicken Curry With These Tips

    Beginner Cook Or A Bachelor – Everyone Can Make Perfect Chicken Curry With These Tips

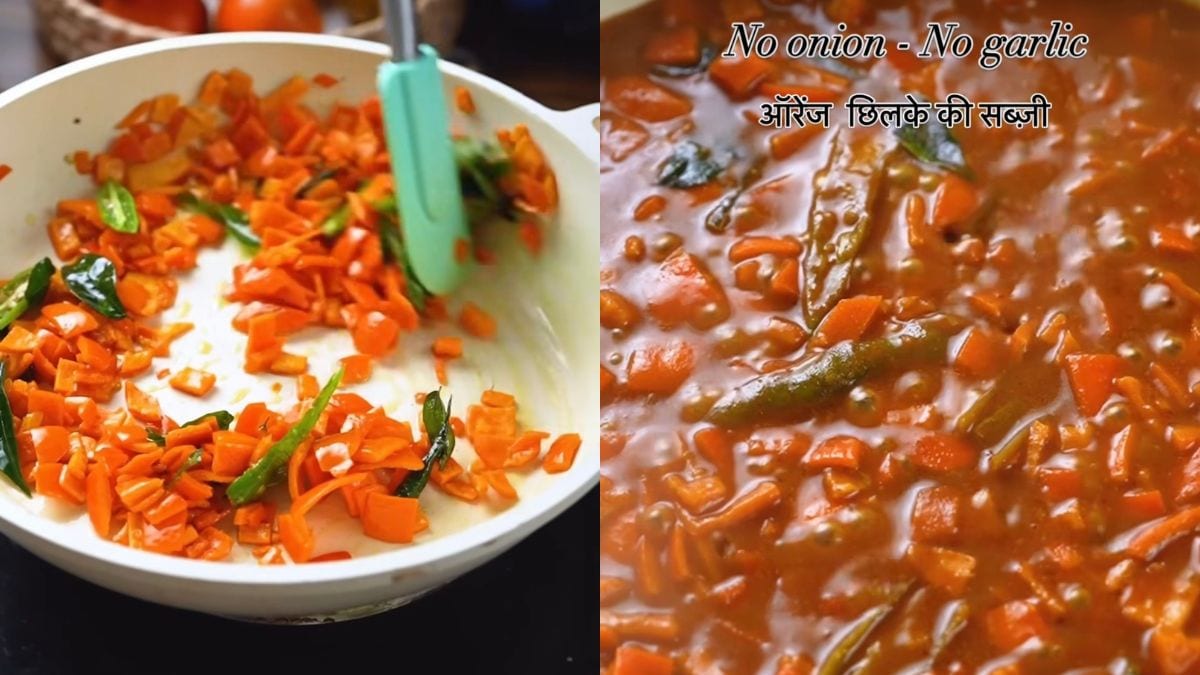
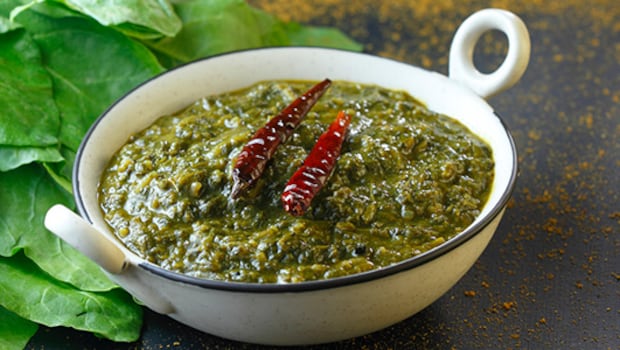
    Cooking is an art that demands precision and technique. It can seem daunting, especially if you’re a bachelor or stepping into the kitchen for the first time. But fear not because traditional Indian food offers a treasure trove of easy and delectable Indian recipes, whether you’re a vegetarian or a meat enthusiast. In a matter of minutes, you can whip up classic Indian dishes like pulao, dal, vegetable curries, and chicken curry, all in the comfort of your home. Just remember to be patient and follow each step carefully.

    Also Read: 5 Surprising Health Benefits Of Adding White Butter To Your Diet – And How To Make It

    Exploring the World of Indian Food:

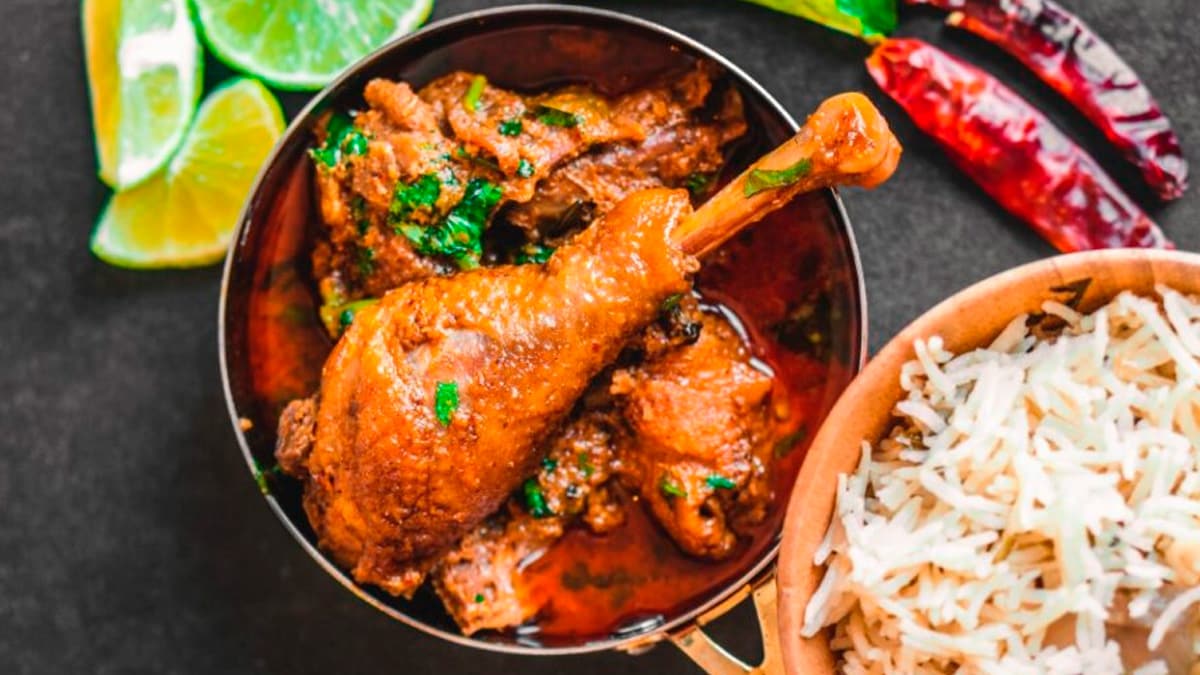
    Indian food is a rich tapestry of flavours, and within it, you’ll discover a myriad of straightforward recipes that don’t require culinary expertise. Take, for example, the humble chicken curry. While many traditional Indian recipes call for an array of spices and intricate cooking techniques, this chicken curry keeps it simple without compromising on taste. Even novice cooks can master it with ease.

    Also Read: Can’t Decide Between Butter Paneer And Shahi Paneer? 5 Factors To Help You Choose

    In a rush? Can’t cook?

    Order from

    Essential Tips To Make Chicken Curry:

    Before we dive into the recipe, here are some essential tips to ensure your chicken curry is a success:

    Prep Smart: Begin by washing the chicken and allowing it to drain in a strainer. This prevents splatters when it hits the hot oil.

    Organized Chaos: Prepare all your spices and ingredients in advance and lay them out on your kitchen counter. This will help you stay on top of things as you cook.

    Golden Onions: Once your onions turn a beautiful golden hue, introduce the ginger and garlic paste. These two ingredients are the aromatic foundation of your curry.

    Tame the Chicken: Give the chicken pieces a good fry to eliminate any raw odours. This step is crucial for a mouthwatering result.

    Ghee or Oil: You have the choice of using ghee, oil, or a combination of both for your chicken curry.

    Cooking Methods: This chicken curry can be prepared in either a pan or a pressure cooker. If you opt for the pressure cooker method, let it whistle only twice, and make sure to release all the pressure before opening the lid.

    Indulge in this simple and delicious chicken curry, whether paired with rice or roti. Give this recipe a go, and you’ll be thanking us later.

    Happy Cooking!

    About PayalFood in the mind, Bollywood in the heart – these two things often shimmer in Payal’s writing. Besides penning thoughts, Payal enjoys a playful tango with new and delicious recipes. Roaming around is her jam; whether catching up on the latest flicks or grooving to the beat, Payal knows how to keep her empty moments brimming with flavour and rhythm.

    Source link

  • 5 Tips To Make Perfect South Indian Coconut Chicken Curry At Home

    5 Tips To Make Perfect South Indian Coconut Chicken Curry At Home

    South Indian food never lets us down, right? From the light and fluffy upma for breakfast to the delicious, comforting curries for lunch and dinner, South Indian cuisine has something for everyone. The region offers a range of veg and non-veg dishes, each with its own unique twist. When it comes to non-vegetarian curries, every part of South India has its own version of chicken curry-like Andhra-style, Chettinad, and so many more. The list of options is endless! Today, we’re adding one more to your list: a mouthwatering, healthy South Indian Coconut Chicken Curry recipe. So, if you want to bring those authentic South Indian flavours into your kitchen, this one’s for you! But before you get cooking, here are some essential tips you need to know to make it just right. Let’s dive in!

    1. Marinate Chicken Properly

    For any chicken curry to shine, marinating the chicken is key. Without it, the curry just won’t hit the same. For the South Indian Coconut Chicken Curry, start by placing the chicken in a bowl and washing it thoroughly. Then, marinate it with curd, ginger-garlic paste, turmeric, and salt for at least 30 minutes. You can adjust the time based on your schedule, but make sure you don’t skip this step! A solid 30-minute marinate is what makes the chicken tender and juicy.

    2. Use Curry Leaves and Mustard Seeds

    This South Indian curry gets its iconic flavour from mustard seeds and curry leaves. To get the best flavour, cook them in coconut oil. The temperature of the oil matters, so be sure to heat it right. Add the mustard seeds and wait for them to crackle. Once they do, throw in the curry leaves and roast them for a few seconds to let that awesome aroma fill the oil.

    3. Add Tamarind In The Right Quantity

    The flavour of the curry really depends on how you balance the ingredients. And tamarind pulp? It’s a tricky one. Too much, and your curry will be too sour, so you have to get the balance just right. For 1 kg of chicken, use 2 teaspoons of tamarind pulp. If you’re cooking with half a kg of chicken, one tablespoon is perfect.

    4. Cook It On Low Flame

    Low and slow is the way to go when cooking this curry. Simmering on a low flame allows the spices to blend together beautifully, which enhances the flavour of the gravy. Plus, it keeps the spices from burning. Cooking on a low flame also makes the chicken super tender. If you cook it on high heat, the meat might turn tough and dry. Let the chicken cook in its own juices for the best taste!

    5. Right Time To Add Coconut Milk

    Coconut milk is what makes this curry creamy and dreamy. Homemade coconut milk is your best bet for the richest flavour, but if you’re using packaged coconut milk, make sure it’s free of artificial flavours or preservatives. Always add coconut milk to the curry on low heat, and cook it gently. This keeps the milk from curdling and ensures your curry stays smooth and velvety.

    Click here for the full recipe of South Indian Coconut Curry. Keep these tips in mind next time you make this chicken curry, and you’ll be all set to impress!

    Source link

  • Who Knew Orange Peels Could Be This Tasty? Try This South Indian Orange Peel Curry Today

    Who Knew Orange Peels Could Be This Tasty? Try This South Indian Orange Peel Curry Today

    Oranges are among the most beloved fruits, especially during winter. Loved for their sweet and citrusy flavour, we often buy them in abundance to make delicious juices or simply relish them as is. And before we know it, we’re left with loads of leftover peels. For most of us, our first reaction would be to discard them. After all, what can you really do with orange peels? But hey, what if we tell you that you can use those peels to make a mouth-watering curry? Yes, you heard that right. Introducing: Orange Peel Curry, a unique culinary delight from South India that’s sure to impress your taste buds.
    Also Read: 5 Genius Ways To Use Orange Peels In Day-To-Day Life

    Add image caption here

    Photo Credit: iStock

    What Is Orange Peel Curry?

    Orange peel curry is a classic South Indian recipe that turns leftover orange peels into a flavourful dish. To make it, orange peels are cooked with spices, chillies, and tamarind water. The result? A lip-smacking curry that offers an interesting blend of sweet, tangy, and spicy flavours. It also doesn’t contain any onion or garlic.

    What To Serve With Orange Peel Curry?

    Deciding what to pair with an orange-flavoured curry can be confusing. But fret not, pair it with a bowl of regular steamed rice and you’re good to go. Additionally, you can also savour this curry with curd rice, idlis, or dosas.

    How To Make Orange Peel Curry At Home | Orange Peel Curry Recipe

    The recipe for this orange peel curry was shared by MasterChef Aruna Vijay on her Instagram. Start by cleaning and chopping the orange peels. Heat oil in a pan and add slit green chillies, curry leaves, and chopped orange peels. Let them cook for a few minutes. Then, add sambar masala along with salt and give it a good mix. Add tamarind water and cook until you see bubbles on top. Finally, add in jaggery powder and mix well. Serve hot and enjoy!
    Also Read: Is It Okay To Drink Orange Juice Every Day? The Answer Might Surprise You…

    Watch the complete video below:

    Tips To Make Perfect Orange Peel Curry:

    1. Use Gingelly Oil

    Aruna suggests using gingelly (sesame) oil to cook all the ingredients, as it gives the curry a distinct flavour that regular vegetable oil can’t.

    2. Don’t Overcook Orange Peels

    She advises cooking the orange peels for no more than 5-7 minutes. Overcooking can make the curry taste bitter.

    3. Choose Good Quality Sambar Masala

    Using good-quality sambar masala is essential. If possible, make it fresh at home for the best flavour.

    So, what are you waiting for? Try making this orange peel curry for lunch or dinner and impress your family with your cooking skills.


    Source link

  • Badaga Chicken Curry Recipe From Nilgiris Will Transport You To The Gorgeous Region Of Tamil Nadu

    Badaga Chicken Curry Recipe From Nilgiris Will Transport You To The Gorgeous Region Of Tamil Nadu

    My first brush with the distinctive cuisine of the Badgas was in 2015. It was a chance experience at the Vivanta Coimbatore. I had stopped to check out their dinner buffet and discovered a specially curated Badaga promotion that was part of that buffet. Those flavours have stayed with me ever since, especially the Badaga Kappu Koi Udhakka (Chicken Curry) that’s powered by their inimitable spice powder (Badugaru udhakka Maas hudi). The term Badaga or Vadugan refers to a group of people who moved to the Nilgiris region (in and around Ooty or Udhagamandalam) about three to four centuries ago from the Mysore region in Karnataka.

    Also Read: 10 Wonderful Dishes from Tamil Nadu You Didn’t Know About

    The name refers to the direction they came from (North). They settled in around 400 villages (or hattis) around the region. They have a unique culture, language (similar to Kannada) and a very distinctive cuisine. My interactions with the culinary team at the Vivanta threw up some interesting insights about the cuisine. The cuisine has developed from locally sourced ingredients, the Badagas have been predominantly a farming community and grow crops like potato, millets, barley and carrots in the Nilgiris.  

    The Badaga diet predominantly revolves around millets like finger millet (ragi) and wheat which are consumed more than rice. It’s been almost a decade since I checked out some of the Badaga favourites like the Bathalu (crispy sun-dried potatoes) at this food promotion. The cuisine is yet to make its way into restaurant menus even in cities like Coimbatore which is close to Ooty and home to a large number of Badagas. Some of the quintessential Badaga dishes include Hachchike (a sweet made with millets) and a delicious mutton curry. Mud pots are still extensively used in many Badaga homes to this day and meals are still served on bronze plates for their unique flavours. 

    Black Pepper Chicken Curry

    Chicken Curry is a popular dish in Indian cuisine. Image Credit: iStock

    One of the standout Badaga dishes is the Badaga Kappu Koi Udhakka or chicken curry. The key to dish (see recipe) is the flavourful spice powder. You can try this recipe at home: 

    Badaga Kappu Koi Udhakka – Chicken Curry Recipe

    Ingredients:

    • 1 kg Chicken- cut into pieces 
    • 2 cups Shallots 
    • 3-4 tbsp Badaga chicken masala powder (see recipe below)
    • 1/4 cup oil 
    • 2 tbsp ghee 
    • 3 cups water to cook 
    • Seasoned mud pot to cook (optional)
    • Salt as required 

    Method:

    1. Heat oil in a mud pot or pan and add the shallots. Fry on a low flame for 15-20 mins till the shallots have turned to a very dark brown. The inside of the shallots needs to get well cooked and caramelised. 
    2. Add the Badaga masala and salt and cook for 3 to 4 minutes on a low flame. Do not burn the masala. Set the flame on low and continue to cook. 
    3. Grind the shallot spices into a paste mix into the chicken and marinate for 30 mins.
    4. Heat the ghee in the same mud pot. Add the marinated chicken and fry on a low flame for 5 minutes till the spices smell aromatic. Add water and bring to a boil.
    5. Simmer for 30 minutes. This gives enough time for the spices to flavour the chicken. 
    6. Add water if required, and make sure the chicken curry doesn’t dry out. Taste and adjust salt as required.
    7. When the chicken is cooked remove from the heat. Make sure it’s not too dry and there’s enough gravy. 
    8. Serve it with hot steamed rice or dosa. The curry should thicken once it’s cooked.

    Also Read: Foodie’s Guide To Tamil Nadu: 5 Popular Street Foods You Must Try

    Recipe For the Badaga Masala Powder

    Ingredients:

    100 gm dry red chilli 
    200 gm coriander seeds
    50 gm cumin seeds
    4 tbsp fennel seeds
    1/4 cup raw rice
    1 tbsp mustard seeds 

    Method:

    1. Dry roast all the ingredients separately. 
    2. Let them cool completely. Once it cools, add all the ingredients into a mixer jar and grind it to a fine powder. The colour of the masala powder should be dark brown. 
    3. Transfer this ground masala powder to a piece of paper. Spread and mix it well.
    4. Store it in an air-tight container, once the masala powder is completely cool and dry.
       

    About Ashwin RajagopalanI am the proverbial slashie – a content architect, writer, speaker and cultural intelligence coach. School lunch boxes are usually the beginning of our culinary discoveries.That curiosity hasn’t waned. It’s only got stronger as I’ve explored culinary cultures, street food and fine dining restaurants across the world. I’ve discovered cultures and destinations through culinary motifs. I am equally passionate about writing on consumer tech and travel.

    Source link

  • 5 Mistakes To Avoid When Making A Classic Egg Curry

    5 Mistakes To Avoid When Making A Classic Egg Curry

    Eggs are a total powerhouse food! Not only are they super versatile, but they’re also packed with protein, making them a go-to for a healthy meal. Sure, you’ve probably had them in omelettes, sandwiches, or even salads, but have you tried a classic egg curry? It’s one of those dishes that’s just so satisfying and comforting. While there are a ton of ways to make it, most of us crave that restaurant-style, spicy egg curry. That perfect blend of tomatoes, onions, and spices that you just can’t get enough of. But sometimes, when we make it at home, it doesn’t quite hit the mark. Don’t worry, though! If you want your egg curry to taste like it’s straight from your favourite restaurant, just avoid these common mistakes.
    Also Read: Akuri Eggs Recipe: This Parsi-Style Scrambled Eggs Recipe Is Sure to Amp Up Your Morning Plates

    Here Are 5 Mistakes To Avoid When Making A Classic Egg Curry:

    1. Not Putting Ingredients in the Right Order

    Patience is key when making a killer egg curry. The order in which you add your ingredients matters more than you think! Don’t rush and dump everything in at once – this can totally mess with the flavour. Taking your time to add the ingredients in the right sequence will make all the difference.

    2. Using Old Spices

    Ever used that spice jar that’s been sitting in your pantry for months? Yeah, that’s a big mistake! Ground spices lose their flavour and aroma super quickly, so using old spices can leave your curry tasting flat and bland. For the best flavour, always go for freshly ground spices. Trust me, your curry will thank you for it.

    3. Not Roasting the Spices Properly

    The secret to a flavorful curry lies in perfectly roasted spices. When cooking, make sure you take the time to properly roast your onions, tomatoes, and spices. If you’re using whole spices like cardamom, black pepper, or cloves, roast them in oil first. If you’re using ground spices, you’ll notice the oil will separate when it’s done right – that’s your sign it’s time to move forward.

    4. Using Cold Water

    This is one of the biggest mistakes! When you add cold water while frying the spices, they won’t cook properly, and the curry won’t have the deep flavour you’re after. Keep your water at room temperature and add it carefully to maintain the consistency of your gravy. Too much water and it’ll be too runny – nobody wants that!

    5. Not Boiling the Eggs Properly

    If you’ve ever had egg curry with overcooked or undercooked eggs, you know how it can totally ruin the dish. Boil your eggs just right – they should be cooked all the way through. And here’s a little pro tip: before you add them to the curry, make a small cut on the surface of each egg and lightly saute them in some oil. This little step will make your curry pop with flavour.

    So next time you’re craving that classic egg curry, follow these simple tips and enjoy the delicious results!

    Source link

  • Nadru Kofta Recipe: A Simple Lotus Stem Curry That Will Leave You Asking For More

    Nadru Kofta Recipe: A Simple Lotus Stem Curry That Will Leave You Asking For More

    Whether it’s crispy, fried, or curried, Nadru – or lotus stem – is one vegetable that can be enjoyed in many ways. It has a crunchy texture and tastes somewhat sweet and juicy, making it super versatile in the culinary world. This vegetable is a hit in Kashmiri cuisine, with Nadru Yakhni being served on major occasions. While Nadru Yakhni has its own charm, why not give it a unique twist with simple ingredients from your pantry? Here, we bring you a delicious curry recipe featuring the flavors and goodness of lotus stem – Nadru Kofta! This recipe is simple, spicy, and so versatile that you can make it every day for your lunch meals without getting bored. Want to know how to make it? Let’s take a look at what’s required to prepare Nadru Kofta at home.

    Also Read: Aloo Kofta Recipe: Make This Velvety Veg Kofta For Mid-Week Indulgence

    Latest and Breaking News on NDTV

    What Is Nadru Kofta?

    Nadru Kofta is a delightful twist on Kashmir’s classic dish, Nadru Yakhni. This dish is perfect for when you’re craving a kofta curry with a healthy twist. The best part? It’s made with simple pantry ingredients and can be prepared in no time. It’s a great way to incorporate Nadru’s goodness into your routine while also taking a break from regular curries. Pair it with hot rotis and rice, and you’re all set to dig in!

    Is Nadru Kofta Healthy?

    Absolutely! Nadru Kofta is incredibly healthy. Here’s why:

    1. Digestive Benefits

    The flesh of lotus root is rich in dietary fiber, which helps maintain smooth and regular bowel movements. Nadru can reduce constipation while optimizing nutrient absorption through digestive and gastric juice secretion.

    2. Reduces Risk of Anemia

    Nadru is loaded with iron and copper, essential for red blood cell production. These nutrients help reduce the risk of anemia and improve blood circulation.

    3. Regulates Blood Pressure

    With significant levels of potassium, Nadru helps maintain fluid balance in the body. It relaxes blood vessels and reduces strain on the cardiovascular system.

    4. Provides Mental Clarity

    Lotus stem contains pyridoxine, a component of the vitamin B complex. It helps control irritability, headaches, and stress levels in the body.

    Mix breadcrumbs in your minced chicken and shape them into circles.

    Photo Credit: iStock

    How to Make Nadru Kofta | Nadru Kofta Recipe

    Making Nadru Kofta is straightforward. This recipe was shared on Instagram by content creator @princebchef. Here’s how to make it:

    1. Prepare Kofta Balls

    Grate the potato and Nadru stem together. Add chopped green chilies, coriander leaves, salt, garam masala, coriander powder, cumin powder, and besan. Mix well and shape the mixture into small balls.

    2. Fry the Balls

    Heat oil in a wok. Gently add the kofta balls and fry them until golden brown. Fry on medium heat to achieve the perfect crunch and color. Set aside.

    3. Prepare the Gravy

    In a pan, heat some desi ghee. Add whole spices like cumin, chili, and bay leaf. Once aromatic, add saunf powder, garam masala, turmeric, red chili powder, and salt. Stir well, then add fresh curd. Follow with water to adjust consistency.

    4. Assemble

    Add the fried kofta balls to the gravy and cook for 5-6 minutes to let them soak up the flavors. Garnish with chilli oil and serve!

    Can You Make Nadru Kofta Healthier?

    Yes, you can! Instead of deep-frying the balls, use an air fryer to bake them. This method retains the flavors of the vegetable and spices without the guilt of excess oil. You can also add cashew paste to the gravy for creaminess, eliminating the need for heavy cream.

    Watch the full video below:

    Also Read:Kashmiri Mutton Kofta, Malai Kofta Dum And 5 Other Non-Veg Kofta Recipes

    What’s your favorite way to eat Nadru? Let us know in the comments below!


    Source link

  • Palak + Black Chana = The Cosy Curry You Need This Winter

    Palak + Black Chana = The Cosy Curry You Need This Winter

    Spinach (palak) is a winter wonder vegetable, and if you haven’t yet tried it in all its delicious forms, now’s the time. Sure, we all know the classic Palak Paneer, Palak Aloo, Palak Ka Saag, and even Palak Paratha, but today we’ve got something a little different – Palak Masala Chana. This flavorful, healthy curry is exactly what your winter dinner needs. It’s packed with taste, it’s super nutritious, and it’s a great way to add some variety to your meals. Spinach is already an iron powerhouse, and when you pair it with black chickpeas, you’re doubling the health benefits. Black chickpeas are high in protein and fibre, both of which are fantastic for weight loss. So, yes – this curry is your new best friend for both taste and health. Let’s take a look at the recipe!

    Also Read: 5 Wonderful Benefits Of Spinach You Never Knew

    Palak Masala Chana Recipe: How To Make Palak Masala Chana

    First things first, soak your chickpeas overnight or for about 4-5 hours. Once soaked, toss them in a pressure cooker with some salt and cook them for 5-6 whistles. While that’s cooking, rinse and boil the spinach, then blend it into a smooth paste.

    Next, check the chickpeas to make sure they’re cooked through. Now, blend three onions into a paste, and do the same for tomatoes and ginger-garlic. Pro tip: blending everything into a paste makes the curry extra flavorful!

    Heat some oil in a pan, toss in cumin seeds and a pinch of asafoetida. Then, add the onion paste and sauté for a bit. After that, stir in the ginger-garlic paste, cook it for a minute, and then add the tomato paste. Let it cook together for another two minutes before adding red chilli powder, turmeric, coriander powder, and salt. Stir it all up and let the flavours meld together.

    Once your masala is smelling amazing, add the boiled chickpeas to the pan. Mix them with the masala and cook for a few minutes. Then, pour in the spinach puree and stir it all together. Cover the pan and cook for about 10 minutes, stirring occasionally. Once it’s done, turn off the heat and sprinkle some garam masala on top. Garnish with fresh coriander.

    For an extra burst of flavour, finish it off with a tadka! Finely chop some garlic, heat some desi ghee in a pan, and fry the garlic with two whole red chillies and some kasuri methi. Let it cook for about two minutes, then pour it over the curry and cover the pan again.

    After a few minutes, remove the lid, and get ready for a mouthwatering experience! Serve this Palak Masala Chana with roti, paratha, puri, or even rice for a wholesome meal. This winter, treat yourself to this delicious dish and enjoy a cosy, comforting dinner.

    Source link

  • Sharad Navratri 2024: Spice Up Your Fasting Days With This Flavourful Makhana Aloo Curry

    Sharad Navratri 2024: Spice Up Your Fasting Days With This Flavourful Makhana Aloo Curry

    Sharad Navratri 2024 is almost here, and preparations are in full swing. This year, it begins on October 2 and ends on October 12. During this time, devotees observe fasting and consume only certain vrat-friendly foods. Among the many options, aloo is one of the most preferred choices. It’s not only super comforting but can be used to make a variety of recipes. But are you bored of the same old aloo recipes? Fret not! Introducing: Aloo Makhana Curry. This incredibly flavourful curry, featuring crispy makhana bites, will be a pleasant change and is a must-try for aloo lovers. The recipe for this lip-smacking aloo curry was shared by chef Saloni Kukreja on her Instagram page. Once you try it, it’ll become your go-to for Navratri festivities.
    Also Read: When Is Sharad Navratri 2024 And What To Eat While Navratri Fasting

    Add image caption here

    Photo Credit: iStock

    What Makes Makhana Aloo Curry A Must-Try This Navratri?

    Makhana aloo curry makes for a delightful addition to your Navratri menu for all the right reasons. It is healthy, packed with flavour, and easy to make – what’s not to love about it? The combination of makhana and aloo works like magic, creating an interesting contrast of textures. Whether for lunch or dinner, this unique aloo curry will surely satisfy your heart.

    What To Serve With Makhana Aloo Curry?

    Makhana aloo curry tastes best when paired with a bowl of steaming hot rice. You can enjoy it with both plain rice or jeera rice, depending on your personal preference. If you’re not a fan of rice, feel free to pair the curry with regular kuttu (buckwheat) roti.

    How To Make Makhana Aloo Curry | Makhana Aloo Curry Recipe

    Start by heating oil in a pan and fry the makhana until they turn golden brown and crispy. Set aside. In a pressure cooker, heat 2 tablespoons of oil. Add the onion paste and cook it for 10 minutes on low-medium flame. Stir in the garam masala powder, cumin seeds, red chilli powder, coriander powder, and green chillies. Cook for 2-3 minutes. Add the tomato paste and cook for a few minutes until the mixture thickens. Add the peeled and chopped potatoes, season with salt, and stir well to combine. Pressure cook for 4 whistles. Once done, let the pressure release naturally. Open the cooker and simmer for 4-5 minutes. Add the fried makhana and mix well. Garnish with freshly chopped coriander and serve hot. Your makhana aloo curry is ready to be relished!
    Also Read: Navratri Special Thali: How To Make A Delicious Navratri Thali At Home

    Watch the complete recipe video below:

    Don’t delay – try this delicious makhana aloo curry recipe soon and make your Navratri celebrations extra special. Happy Sharad Navratri 2024!


    Source link

  • How To Make Curry Leaves Dosa: The Dosa Recipe Youll Wish You Knew Sooner

    How To Make Curry Leaves Dosa: The Dosa Recipe Youll Wish You Knew Sooner

    Dosa is one of the most beloved South Indian breakfast staples, enjoyed not just in India but across the world. Its crisp edges, soft centre, and perfect pairing with chutney and sambar make it an unbeatable meal. While the classic plain dosa has its charm, there’s something exciting about the different variations that have emerged over time. From spicy masala dosa to crunchy rava dosa, dosa’s versatility is boundless. And now, adding a flavorful twist to this list is the humble and tasty curry leaves dosa. Known for their earthy aroma and slightly peppery taste, curry leaves add a unique depth to the dosa batter. Looking for a new dosa variation? You’ve landed on the right page. Here, we present an easy recipe for curry leaves dosa that will elevate your breakfast like never before!

    Also Read: 5 Clever Ways To Use Curry Leaves For Kitchen Cleaning

    Latest and Breaking News on NDTV

    Is Curry Leaves Dosa Healthy?

    Absolutely! Curry leaves dosa is a brilliant way to add more flavour and nutrients to your diet. Its star ingredient, curry leaves, is packed with vitamins A, B, C, and E, which are extremely beneficial for strengthening hair follicles, reducing hair loss, and improving scalp health. Additionally, these benefits also make curry leaves an excellent ingredient for supporting skin and eye health. This delicious addition to your regular dosa makes it a healthier alternative packed with natural flavours. Plus, making it at home lets you control the quality of ingredients, making it a more wholesome choice for breakfast.

    How To Store Leftover Dosa Batter?

    If you’ve made extra curry leaves dosa batter, don’t worry! You can store it for later. Just transfer it to an airtight container and keep it in the fridge. It will stay fresh for 2-3 days. Make sure to give it a good stir before using it, as the green paste might settle a bit. If you’re using it after a day, add a little water if it thickens to balance the consistency. It will be fresh and ready to cook in no time!

    Latest and Breaking News on NDTV

    Photo Credit: iStock

    Curry Leaves Dosa Recipe | How To Make Curry Leaves Dosa

    Making curry leaves dosa is pretty simple. This recipe was shared on Instagram by digital content creator Nitya Hegde. To make it, start by:

    1. Making Green Paste

    Wash and rinse curry leaves, coriander leaves, and green chillies. Take a dry blender and add the ingredients along with salt, cumin, and 1/2 cup of water. Blend to make a green paste. Set it aside.

    2. Combine Ingredients

    Take two cups of dosa batter and add the freshly made green paste to it. Mix well so the dosa batter changes colour to green, with no patches left.

    3. Cook Dosa

    Heat a tawa on medium flame and grease it with some oil. Add a ladleful of batter onto the greased pan and spread it out. Cover and cook the dosa, drizzling some oil on the sides. Cook until it’s nice and crisp. Enjoy!

    Bonus Tip:

    Pair this delightful dosa with a generous serving of piping hot sambar and spicy peanut chutney, and you’re good to go!

    Watch the full video below:

    Also Read: Don’t Toss Those Curry Leaves! Make Curry Powder from Leftover Curry Leaves


    Source link

  • Wrestling Icon Snubs LeBron James and Stephen Curry Despite Paris Olympics Link-Up: “Never Really Cared”

    Wrestling Icon Snubs LeBron James and Stephen Curry Despite Paris Olympics Link-Up: “Never Really Cared”

    Recently, RUDIS shared a YouTube video featuring Spencer Lee titled “Spencer Lee | Unlocked.” During the interview, the host posed the question, “Have you ever been starstruck?” Lee’s response was unexpected. He explained that he doesn’t really experience that feeling, saying, “No, I don’t really get like that. You know, I don’t know if it’s ego or if it was like confidence growing up, but I never really cared about people who are famous or who are like, good.” He further mentioned that even during the Olympics, meeting legends like LeBron James and Steph Curry felt pretty casual for him.

    Lee recalled meeting Snoop Dogg, who gave him a friendly dab, and while it was cool, he didn’t find himself overly starstruck. He just greeted him with a laid-back, “Hey, Snoop Dogg, sick.” However, he admitted that if anyone could make him feel starstruck, it would be Faker from League of Legends Esports; he thinks Faker is pretty cool and would definitely get his attention. Looking back on his journey, it’s clear Spencer has faced a lot of challenges to make it to the Paris Olympic stage.

    How Spencer Lee earned his place on the Paris Olympic stage

    When Spencer Lee snagged the silver medal, he became the first Iowa alum to reach the championship match since current Hawkeyes coach Tom Brands won gold back in 1996. But Paris for him was about so much more than just the medal; it really brought his unique story into the spotlight. He’s not your typical wrestler—eccentric and introverted; Lee loves Pokemon and fantasy graphic novels.

    In 2021, Lee wrestled through a torn ACL in his right knee, only to tear the ACL in his left during the NCAA tournament. Even with limited movement and the inability to sprawl or shoot, he somehow clinched his third straight NCAA title. Unfortunately, those injuries meant he couldn’t compete in the 2021 Olympic trials. After initially trying to rest, he ultimately chose to undergo surgery on both knees, which kept him out for the entire 2021-22 college season.

    Lee returned to the mat midway through the 2022–23 season and dominated, winning all 20 of his matches until the NCAA semifinals. His journey to the Paris Olympics was no walk in the park, either. In the U.S. Olympic trials, he faced off against former Iowa wrestler Thomas Gilman, who had won bronze in Tokyo. Lee won the best-of-three match 6-3 and then pinned Gilman to take the national title.

    But that victory didn’t automatically secure his spot in Paris; he also had to finish in the top three at the World Olympic Games Qualifier in Istanbul. There, he showed his dominance, winning all four matches with an impressive combined score of 42-11, earning his ticket to the Olympics! In a nutshell, Spencer Lee’s skills have turned his Olympic dreams into a reality!

    Source link