hacklink hack forum hacklink film izle hacklink marsbahisizmir escortsahabetpornJojobetcasibompadişahbetjojobet

Tag: Genius

  • Not Just For Sandwiches: 6 Genius Ways To Use Mayonnaise

    Not Just For Sandwiches: 6 Genius Ways To Use Mayonnaise

    Mayonnaise is one of the most popular condiments in the kitchen. It is creamy, smooth, and oh-so-irresistible. Spread it across a slice of sandwich bread, and you’re good to go! But did you know mayonnaise is far more versatile than just being a bread companion? Its rich texture and tangy flavour can elevate even the simplest of meals. Plus, it’s incredibly adaptable, making it suitable for various foods. So, the next time you’re unsure what to do with your big jar of mayo, here are six fun and unique ways to use this condiment.

    Also Read: 5 Things To Add To Your Market-Bought Mayonnaise To Make It Extra Tasty

    Latest and Breaking News on NDTV

    Photo: iStock

    Here Are 6 Unexpected Uses for Mayonnaise That’ll Blow Your Mind:

    1. Make Your Cheese Sandwiches Cheesier

    The next time you’re preparing a cheese sandwich at home, replace butter with mayonnaise. The best part about this trick is that it spreads evenly and helps achieve that signature golden-brown crust on both sides. Plus, it adds a tangy kick to your sandwich, making the gooey, cheesy experience even more indulgent!

    2. Polish Plant Leaves

    Yes, mayonnaise can enhance your plant’s appearance too! Simply rub a small amount onto the leaves with a soft cloth, and the dullness will vanish almost instantly. The glossy look not only makes your plants Instagram-worthy but also forms a protective barrier against the sun.

    3. Remove Sticker Residue

    Bought new utensils with stubborn stickers? Mayonnaise can save the day. Spread a generous amount over the sticker, leave it for a few minutes, and then wipe it away. The oils in the mayonnaise help dissolve the adhesive, leaving your jars and surfaces spotless.

    Latest and Breaking News on NDTV

    Photo: iStock

    4. Moisten Your Cakes

    Mayonnaise in baking? Absolutely! Add a spoonful to your cake batter for a moist and tender texture. Since mayonnaise contains eggs and oil, it enhances the flavour and consistency of your cakes, especially chocolate ones. Don’t worry-you won’t taste any mayonnaise in the finished product.

    5. Condition Your Hair

    Is your hair feeling dry or frizzy? Skip the store-bought conditioner and reach for a jar of mayonnaise instead. Its rich oils and fats deeply condition your hair. Apply a generous amount to damp hair, leave it for 20 minutes, and rinse thoroughly. For the best results, wrap your hair in a towel after applying the mayo-it’ll leave your hair shinier and smoother!

    6. Make Your Salads Creamier

    Bored of plain salads? Transform them with mayonnaise! It adds a creamy texture and tangy flavour, turning dull salads into irresistible dishes. Plus, it helps the dressing cling better to the vegetables, ensuring every bite is flavour-packed and delightful.

    Also Read:5 Delicious Sandwiches You Can Make With A Jar Of Mayonnaise

    Source link

  • 5 Genius Ways Vinegar Comes In Handy Beyond Cooking

    5 Genius Ways Vinegar Comes In Handy Beyond Cooking

    Vinegar is a pantry staple for many. It is used for several dishes including salad dressings, marinades, and pickles. However, it is also acidic in nature which makes it perfect for various things, aside from flavouring your food. Yes, this humble ingredient can do wonders for your home and not just dishes. So, the next time you are grocery shopping for a bottle of vinegar, maybe buy two. Let’s find out how vinegar can help you around the house in an extremely pocket-friendly way!

    Also Read: This Genius Hack To Peel Boiled Egg Will Change Your Life – And All You Need Is A Spoon!

    Add image caption here

    Photo: Pexels

    Here Are 5 Uses Of Vinegar Beyond Cooking

    1. Multi-Purpose Cleaner

    Vinegar is an excellent natural alternative to chemical cleaners. Thanks to its acidity, vinegar can easily clean grease, grime, and even soap residue with ease. Just mix equal parts vinegar and water in a spray bottle, and you’ve got a strong multi-surface cleaner for your kitchen, bathroom and windows. You can also add a few drops of essential oil for a pleasant scent. Just make sure to avoid this cleaner on marble, as it can cause damage over time.

    2. Odour Remover

    Do you have stubborn smells in your kitchen? Then vinegar can help! Since it’s acidic in nature, it can neutralise odours instead of just masking them. All you have to do is, leave a bowl of vinegar out overnight to absorb unpleasant smells in the air. You can also use it to deodorise your fridge or trash bin. This will leave your kitchen fresh and new for another batch of cooking! Moreover, if you have dirty clothes with a sweaty smell, then add a cup of vinegar to your washing machine to remove odour and keep your clothes fresh.

    3. Fabric Softener

    If you are looking for a natural way to soften your laundry, especially in winter, then vinegar could be a great option. Just add half a cup of vinegar to your clothes during the rinse cycle of your washing machine. It won’t just help remove smells and detergent residues but also leave your clothes soft and plush. This method is especially useful for people with sensitive skin, as vinegar doesn’t contain the harsh chemicals found in store-bought cleaners.

    Amazons Top Deals On Gardening Tools

    Photo: Pexels

    4. Garden Helper

    Vinegar is a natural and cost-effective investment for your gardening needs. It works as an effective bush killer – simply spray it directly on unwanted plants to dry them out. If you want it to be pet-friendly, make sure it reaches your good plants. Additionally, vinegar is excellent for cleaning rust and dirt from your garden tools. Just soak them in vinegar to restore their shine.

    5. Hair Rinse

    Vinegar, especially apple cider vinegar, is a fantastic natural hair care remedy. Just dilute one part vinegar with two parts water and use it to rinse after shampooing. This concoction will help balance your scalp, reduce dandruff, and remove product buildup, leaving your hair clean and refreshed. Regular use of this concoction will also make your hair shiny and healthier.

    Also Read:Bake Like A Boss: 5 Genius Tips For First-Time Bakers To Excel

    What else can you use vinegar for? Let us know in the comments below.

    Source link

  • Want To Make Restaurant-Style Tandoori Chicken? Follow These 5 Genius Tips

    Isn’t it fascinating to see how versatile chicken truly is? Whether you enjoy healthier versions of it, such as roasted or grilled, or more indulgent versions, the truth is that chicken is loved in many forms and textures. Of course, there are a gazillion mouth-watering chicken recipes out there, but the one that never fails to disappoint our taste buds at any point in time is the classic tandoori chicken. Juicy and succulent pieces of chicken enriched with a smoky flavour would make anyone drool. But whenever we crave some, we usually prefer to go out and relish it, as recreating your favourite restaurant-style tandoori chicken may seem next to impossible. Well, that’s not true at all. All you need is some patience, love, and a few easy tips to keep in mind to make this stellar snack at home whenever you feel like indulging in it. Without further ado, let’s learn about these steps.
    Also Read: Tandoori Chicken Pizza, Sandwich And More: 5 Tandoori Chicken Recipes That Will Make Your Mouth Water

    qndf1lg8

    Indian Cooking Tips: Here Are 5 Easy Tips To Make Restaurant-Style Tandoori Chicken:

    1. Make cuts on the chicken pieces

    Most of us are in such a hurry to make this yummy snack at home that we often miss out on this step. But it’s something that you definitely should not skip. Before you start with the marination process, make sure to make small cuts in the chicken pieces. This will help the marinade seep through, giving it a restaurant-style flavour.

    2. Marinade well

    Once you’ve made small nicks on the chicken pieces, it’s time for marination. Make sure to coat the chicken pieces well with all the ingredients and masalas so that they get fully absorbed into them. You can allow them to sit for a few hours before cooking or even leave them overnight.

    3. Use mustard oil

    Another thing you can do during the marination process is add some mustard oil to it. This can help enhance the flavour of your tandoori chicken to a great extent. It’ll also give them a nice aroma, just like the ones you get at your favourite restaurant. So, make sure not to miss out on this step.
    Also Read: Tandoori Chicken Roll Ups: This Snack Will Make Your Weekend Better

    qujfo928

    4. Keep a piece of charcoal in the oven

    Tandoori chicken is traditionally cooked in a tandoor. But since it’s not very likely for home kitchens to be equipped with a tandoor, an oven is probably your best bet. Make sure to switch your oven setting to grill setting and, if possible, keep a piece of charcoal in the oven. Wondering why? Well, this is what’ll give your tandoori chicken that distinct smoky flavour.

    5. Do not skip applying butter

    Has butter ever been known to cause any harm to a dish? We guess not! So why skip applying some of it while making tandoori chicken as well? Once you’ve set it in the oven, make sure to apply some butter over it. If you do not have butter, you could also use ghee. Trust us, this step will do wonders for its overall taste.

    So, the next time you plan to make tandoori chicken at home, keep these easy tips in mind. Let us know how they worked for you in the comments below. Meanwhile, if you are looking for the perfect tandoori chicken recipe, click here.

    Source link

  • 5 Genius Ways To Spot Fake Hing (Asafoetida)

    5 Genius Ways To Spot Fake Hing (Asafoetida)

    Food adulteration has unfortunately become all too common, affecting several kitchen staples every day. From ghee and paneer to milk and sweets, no ingredient seems safe anymore. Sadly, our favourite spices are no exception. Hing, also known as asafoetida, is a staple in Indian cooking, loved for its unique aroma and flavour, but it is quite vulnerable to adulteration. Used daily in dishes like dal ka tadka and aromatic curries, hing not only enhances taste but also aids digestion. However, consuming adulterated hing can pose serious health risks to you and your loved ones. This is why it’s crucial to know how to identify pure hing. While it might feel challenging to spot fake hing in a sea of options, these simple tips will help you buy authentic and aromatic hing every time.

    Also Read:Why Hing Should Be Added To Foods? Nutritionist Lovneet Batra Answers It

    Latest and Breaking News on NDTV

    Photo: iStock

    Here Are 5 Easy Ways To Spot Fake Hing:

    1. Texture

    If you’re familiar with commonly used spices in Indian cuisine, you’d know that hing has a fine, powdery texture that dissolves easily in dishes. If it feels coarse, it might be mixed with flour or other fillers. Some fake varieties might even clump together, which is a clear sign of added moisture or impurities. To test its texture, rub a small amount between your fingers. If it feels smooth, it’s good to use; if not, it’s time to discard it.

    2. Smell

    Hing is recognised for its strong, pungent aroma, which some might even find overpowering. Authentic hing should have this exact characteristic. If the smell is weak, mild, or feels synthetic, it might not be pure. If you’re unsure about the smell, try adding a pinch of hing to hot oil – its aroma should intensify. If it doesn’t, your hing might be diluted. Trust your nose to gauge the authenticity of hing.

    3. Colour

    Pure hing typically has a yellow or light brown hue, which is a sign of its authenticity. If it appears unusually white or has an inconsistent colour, it’s likely mixed with starch, flour, or other ingredients. While some brands use a lighter shade to attract buyers, its unnatural vibrancy can be a red flag. To be sure, always compare the colour with a trusted brand’s product to spot the difference.

    Latest and Breaking News on NDTV

    Photo: iStock

    4. Dissolve

    Here’s an easy kitchen experiment to test your hing: mix a small amount of it in warm water. Pure hing will dissolve evenly, making the water slightly cloudy. On the other hand, fake or adulterated hing might clump together or leave a residue at the bottom. This quick test works particularly well for powdered hing, where the chances of adulteration are higher.

    5. Packaging

    When the above tips don’t seem helpful, rely on established brands for quality and transparency. Authentic hing usually comes in airtight containers with clear labelling, including ingredient information. However, be cautious of misleading descriptions or unusually low prices, as they are often too good to be true. Another key factor to check is certifications and the manufacturing location. 

    Also Read: This Hing Jeere Ke Aloo Recipe Makes For An Irresistible Addition To Any Meal

    Source link

  • 9 Genius Ways To Cook Potatoes Faster-Youll Never Wait For Dinner Again

    9 Genius Ways To Cook Potatoes Faster-Youll Never Wait For Dinner Again

    Potatoes are a versatile and beloved staple in India and many cuisines around the world, from crispy fries and mashed potatoes to aloo rasedar, aloo matar and more. However, one common issue when cooking potatoes is the time it takes to cook them thoroughly. If you are in a rush or simply looking for ways to speed up your meal preparation, there are several practical tips to help you cook potatoes faster without compromising on taste or texture. Yes, you can cook your potatoes in half the time and prepare your meal in minutes. Too good to be true? Try these cooking hacks yourself to believe it. 

    Also Read: 7 Crispy Potato Snacks To Impress Your Guests

    Here Are 9 Ways To Cook Potatoes Faster:

    1. Cut Potatoes Into Smaller Pieces

    One of the easiest and most effective ways to reduce cooking time is by cutting your potatoes into smaller pieces. The smaller the pieces, the faster they cook. For example, instead of boiling whole potatoes, chop them into cubes or wedges. Smaller pieces have more surface area, allowing heat to penetrate faster, and speeding up the cooking process.

    If you’re making mashed potatoes, consider chopping them into smaller, even pieces. This helps them cook more evenly and reduces the overall boiling time.

    2. Use a Pressure Cooker or Instant Pot

    A pressure cooker or Instant Pot can drastically reduce cooking time. These appliances use high pressure to cook food faster, and they work wonders with potatoes. In just a few minutes, you can cook potatoes that would otherwise take 20 to 30 minutes on the stovetop.

    To cook potatoes in a pressure cooker, peel them (if you wish) and cut them into even-sized pieces. Add a small amount of water (around 1 cup) and cook under pressure for about 5-7 minutes for diced potatoes or 10-12 minutes for whole potatoes, depending on their size. The result will be tender, perfectly cooked potatoes in a fraction of the time.

    3. Microwave Them

    The microwave is an excellent tool for speeding up the cooking process. If you’re cooking whole potatoes, simply pierce them with a fork several times to allow steam to escape, then place them on a microwave-safe plate. Microwave on high for 4-5 minutes per potato, checking for doneness. If needed, turn the potato halfway through cooking.

    For smaller pieces, such as diced potatoes, the microwave can cook them in 3-4 minutes. Just toss them in a microwave-safe bowl, cover them with a damp paper towel, and cook on high, stirring halfway through.

    4. Boil in Hot Water, Not Cold

    When boiling potatoes, always start with hot water instead of cold. Adding potatoes to cold water and then heating them up can significantly increase the cooking time. By starting with water that’s already boiling, the potatoes will begin cooking immediately, reducing the time needed to reach a soft, tender texture.

    For faster results, use a kettle to bring water to a boil before adding it to the pot. This ensures that the cooking process begins immediately, helping your potatoes cook faster.

    Also Read:7 Heart-Warming Potato Recipes That Are A Must In Winter

    Add image caption here

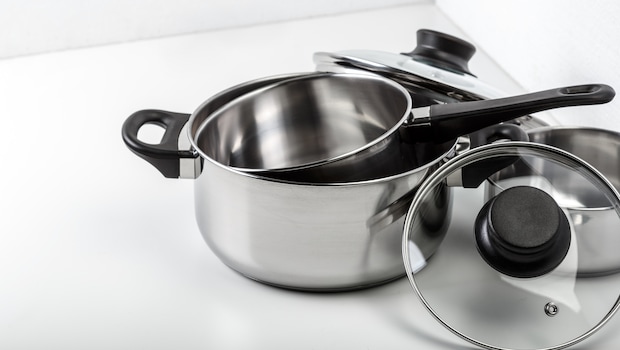
    Boiling potatoes in hot water is better. 
    Photo Credit: iStock

    5. Parboil Potatoes Before Roasting or Frying

    If you plan to roast or fry your potatoes, parboiling (partially boiling) them first can cut down the cooking time dramatically. To parboil, simply add peeled and chopped potatoes to a pot of boiling water and cook for 5-7 minutes, just until they’re slightly tender but not fully cooked.

    Once parboiled, drain the potatoes and proceed with roasting or frying. This will significantly speed up the process, as the potatoes are already partially cooked.

    6. Use a Shallow Pan for Roasting

    When roasting potatoes, the size and shape of the pan you use can make a big difference in cooking time. Using a shallow pan allows the potatoes to be spread out in a single layer, ensuring that they cook evenly and faster. Avoid overcrowding the pan, as this can trap steam and slow down the roasting process.

    Additionally, make sure the pan is preheated before adding the potatoes. The high heat will immediately start cooking them, speeding up the roasting time.

    Also Read: 5 Aloo-Based Breakfast Recipes That Will Be Ready In Minutes 

    7. Cover When Boiling or Steaming

    When boiling or steaming potatoes, covering the pot with a lid helps trap the steam, creating a higher-pressure environment inside the pot that cooks the potatoes more quickly. This reduces cooking time by several minutes, especially when compared to cooking with the lid off.

    Additionally, ensure that your pot has enough water or steam to prevent burning and sticking. A good rule of thumb is to use just enough water to cover the potatoes, allowing the steam to circulate and cook them evenly.

    8. Choose the Right Potato for the Job

    The type of potato you use can impact cooking time. Waxy potatoes, such as red potatoes or new potatoes, hold their shape better during cooking, making them ideal for roasting or boiling. Starchy potatoes, like russets, break down more easily and may cook faster when mashed or used in soups, but they tend to take longer to cook when roasted or boiled.

    If you’re in a hurry, consider using new potatoes or small potatoes, as they cook faster due to their size and waxy texture.

    9. Preheat the Oven for Roasting

    If you’re roasting potatoes, make sure to preheat the oven. Putting potatoes in a cold oven will increase their cooking time. For faster roasting, preheat your oven to 400 degrees F (200 degrees C) and place the potatoes in immediately. If they are cut into smaller pieces, they’ll roast in about 25-30 minutes, but if whole, expect closer to 40 minutes.

    Whether you’re using a pressure cooker, microwave, or simply chopping them into smaller pieces, these strategies will help you whip up potato dishes in no time, making meal prep smoother and quicker. Happy cooking!
     

    Source link

  • 5 Genius Ways To Use Lemon Peels Youll Wish You Knew Sooner

    5 Genius Ways To Use Lemon Peels Youll Wish You Knew Sooner

    Let’s be honest: most of us squeeze the juice out of a lemon and chuck the rest without a second thought. But here’s the tea-lemon peels are just as incredible as the pulp you love. They’re bursting with freshness, flavour, and endless possibilities. Plus, lemons are a staple in our kitchens all year round, so why not make them work harder for us? Whether you’re a DIY queen, a clean freak, or just someone who can’t get enough of that zesty vibe, these lemon peel hacks are about to blow your mind. So, buckle up and get ready to unlock the secret powers of lemon peels at home!
    Also Read: What To Do With Lemon Peel? Use It In These Amazing Ways To Enhance Your Meals

    Latest and Breaking News on NDTV

    Photo: iStock

    Here Are 5 Easy Ways To Use Lemon Peels At Home:

    1. Make Your Home Smell Like a Spa

    Forget pricey air fresheners-lemon peels are your new go-to for fresh vibes. Just simmer the peels with a stick of cinnamon or a few cloves, and voila – your home smells like heaven. Want something even fancier? Dry the peels, pop them in small pouches, and tuck them into drawers or shoe racks. Instant citrusy freshness, anytime.

    2. DIY A Citrus Cleaner That Actually Works

    This hack is a cleaning game-changer. Toss lemon peels into a jar of white vinegar, let it sit for a week, and bam-you’ve got a killer all-purpose cleaner. It’s perfect for greasy counters, stubborn stovetops, or even shining-up bathroom fixtures. Bonus: the zesty scent doubles as a natural deodorizer.

    3. Upgrade Your Meals With Lemon Peel Powder

    Foodies, this one’s for you. Dry those peels, grind them up, and you’ve got magic in a jar. Sprinkle the powder on baked treats, mix it into salad dressings, or add a tangy punch to your favourite drinks and noodles. The best part? It lasts forever, so you’re always stocked for your next kitchen experiment.

    Latest and Breaking News on NDTV

    Photo: Pexels.

    4. Fancy Up Your Drinks in Seconds

    Want to wow your guests (or yourself)? Freeze lemon peels in ice cubes and add them to water, iced tea, or even cocktails. Picture this: a mojito with a frosty pop of lemon zest. Refreshing, fancy, and ridiculously easy. Who knew hydration could look this good?

    5. Clean Your Microwave Without the Drama

    Microwaves can get grimy fast, but lemon peels are here to save the day. Toss a few into a bowl of water, microwave it for a couple of minutes, and let the steam do its magic. The grime loosens up, and your microwave smells like fresh citrus instead of yesterday’s leftovers. Genius, right?

    Also Read: Spruce It Up: 5 Easy Hacks To Clean Kitchen With Lemon Juice

    Got any other brilliant ways to use lemon peels? Drop your hacks in the comments-we’re all ears (and lemons)!

    Source link

  • 5 Genius Ways to Store Dry Coconut and Keep It Fresh for Months

    5 Genius Ways to Store Dry Coconut and Keep It Fresh for Months

    Coconut is one of those ingredients that can totally transform a dish, whether it’s in a savoury curry or a sweet dessert. It’s a staple in many Indian kitchens, but storing it can be a challenge. After all, dry coconut tends to go bad pretty quickly – either it gets mouldy, wormy, or just loses that delicious flavour. But don’t worry! With these easy tips, you can store dry coconut for months and still enjoy its amazing taste in your cooking. Let’s dive in!
    Also Read: Why Coconut Rasam Is The Perfect Winter Soup (And How To Make It)

    Here Are 5 Simple Ways To Store Dry Coconut And Never Worry About Spoiling Again:

    1. Store in a Rice Container

    Here’s a simple trick: store your dry coconut in a rice container. First, wipe down the coconut with a wet cloth, then leave it out in the sun for a while to dry it completely – moisture is the enemy here. Once it’s dry, cut the coconut in half, place it in the middle of the rice, and close the lid. This will keep the coconut fresh and free from spoilage for a long time!

    2. Use an Airtight Container

    For long-lasting freshness, store your coconut in an airtight container. Just chop the dry coconut into small pieces, making sure there’s no moisture left on them, and seal them up in the container. The airtight seal will keep it from going stale or losing flavour.

    3. Grate Coconut

    If you like to use dry coconut often, grating it before storing is a game-changer. Grate the coconut, then pop it into an airtight container for easy access whenever you need it. You can also chop it into smaller pieces if you prefer, but grating is great for curries, desserts, or any recipe that calls for coconut.

    4. Store Coconut in a Glass Jar

    Glass jars are perfect for storing dry coconut. After cutting it in half and cleaning it with a cloth, dry it in the sun for a bit – just don’t leave it out too long since it’s already dry. Rub a little coconut oil on the surface and store it in a glass jar. This method keeps it fresh and adds a nice touch of flavour!

    5. Select the Right Coconut

    The key to keeping your coconut fresh starts with choosing the right one at the store. Look for coconuts that are free of cracks, yellow spots, or any other damage. A fresh coconut should be smooth and free from blemishes. Choosing a good coconut will help ensure that it stays fresh and flavourful for longer.

    Next time you’re buying or storing dry coconut, just keep these tips in mind! That way, you can keep your coconut fresh and ready to add delicious flavour to all your dishes.

    Source link

  • Struggling To Separate Stuck Utensils? This Genius Hack Has Got You Covered

    Struggling To Separate Stuck Utensils? This Genius Hack Has Got You Covered

    Picture this: you’re all excited to cook your favourite dish and have gathered all the ingredients. You’ve even switched on the gas stove. But as soon as you take out the utensil to cook your dish in, you realize it’s stuck in another utensil. You find yourself tugging at them, trying to separate them. Sounds relatable, right? We’ve all faced this challenge in the kitchen at some point. And honestly, we know how frustrating it can be. But hey, there’s a solution for everything, and this common kitchen problem is no exception. We recently came across a genius hack on Instagram that shows how you can separate stuck utensils in no time.
    The video of this genius hack was shared by digital creator Deepti Kapoor. In the clip, she is seen pouring water into the stuck utensils, ensuring it seeps inside. She then applies a generous amount of oil to all sides of the utensils. Next, she places the utensils over a gas stove and allows them to simmer for about 2-3 minutes. Once done, using a cloth or wearing gloves, she carefully separates the two utensils. She explains that this hack works because the steam from simmering and the lubrication from the oil makes it easier to separate them. So simple, right?
    Also Read: Watch: A Game-Changing Hack To Make Fried Paneer Soft, Not Chewy

    Watch the complete video below:

    Since it was shared, the video has amassed over 55.9K views and thousands of likes. Internet users were quite impressed with this hack and couldn’t wait to try it out. One person commented, “Kamaal hi ho gaya ma’am, mein aksar is wajah se pareshan rehti hoon (This is amazing, I’m often stressed because of this problem).” Another user suggested their method and said, “Mein kitchen ke platform pe dabba maarti hun toh dhakkan khul jaata hai (I hit the box on the kitchen platform, and the lid opens).” “Thanks, dear, for the wonderful hack,” added a third user. A fourth comment read, “Can’t wait to try out this hack. Thank you!”
    Also Read: 5 Easy Hacks To Keep Your Coffee Warm On Cold Days
    Earlier, a viral hack demonstrated how one can pour oil from a packet without any splatter. In the clip, a woman is seen taking a ladle and placing it upside down in a glass bottle. She then cuts the packet of oil from the side, as one normally would, and simply pours the oil into the jar. And voila, the oil flows inside without making any mess. You can read all about it here.

    Did you find this hack useful? Do you have any other methods for separating two stuck utensils? Let us know in the comments!


    Source link

  • 5 Genius Ways To Make Your Fruit Platter More Presentable

    5 Genius Ways To Make Your Fruit Platter More Presentable

    While tossing some fruits in a bowl works fine for a quick snack, when it comes to brunch, a dinner party, or a hearty weekend treat, your fruit presentation deserves more love. Think of it as the edible showpiece on your dining table, one that is packed with taste, health, and vibrant colours. And the best part? You don’t need to be a professional chef to make it look interesting. With these tips, you can make your house party fruit platter both delicious and Instagram-worthy!

    Also Read: Should You Eat Fruits Before Or After A Meal?

    Latest and Breaking News on NDTV

    Photo: iStock

    Here Are 5 Tips To Arrange A More Beautiful Fruit Platter

    1. Pick A Colourful Variety

    Fruits are like nature’s rainbow, so make the most of them! Take red strawberries, yellow pineapple, green kiwi, orange slices, and purple grapes for a vibrant platter. The key is to balance bold-coloured fruits with neutral ones like banana or apple slices. Aside from becoming visually attractive, a mix of colours also offers diverse flavours, ensuring there’s something for everyone to enjoy.

    2. Slice It Creatively

    How you cut your fruit can make a huge difference. Instead of slicing simple chunks, try thin orange wheels, watermelon triangles, or melon balls. You can use a cookie cutter to make fun shapes like stars and hearts. There are plenty of fancy yet affordable knife options available in the market right now that’ll help you slice the fruit in creative ways, even in a zig-zag pattern.

    3. Play With The Placement

    If you want to make your fruit platter look amazing, play with its arrangement. Group similar fruits together for a clean, organised look or alternate colours for a vibrant mosaic effect. Start by placing larger fruits first, like pineapple chunks or watermelon slices. Then, you can fill the gaps with smaller fruits like berries and grapes. You can also add a spiral arrangement for a unique look.

    Latest and Breaking News on NDTV

    Photo: iStock

    4. Add Garnishes

    Just fruits won’t do the trick. You’ll also need to add some kind of garnish to elevate it. Use fresh mint leaves, edible flowers, or a dash of shredded coconut to make the fruit platter pop. For a more tropical vibe, you can also use pineapple leaves. Garnishes won’t just enhance the aesthetic appeal of your fruit platter but also add a subtle aroma to it.

    5. Include A Dip

    If you’ve noticed at restaurants, they always serve a dip alongside their regular dishes. This is because it adds to the presentation. A small bowl of dip can instantly elevate your platter. Try yogurt, honey, or dark chocolate for healthier pairings. Make sure to place the dip in the centre of the platter for easy accessibility. A dip will not only add an extra layer of indulgence but also become a central point of the platter.

    Also Read:Eating Fruits Or Drinking Fruit Juice – What Is Better? Here’s What Expert Says

    Source link

  • 5 Genius Ways To Use Orange Peels In Day-To-Day Life

    5 Genius Ways To Use Orange Peels In Day-To-Day Life

    Oranges are the ultimate winter delight. They bring a burst of sunshine to chilly days with their juicy sweetness. Whether you enjoy it as a snack or juice to make a refreshing drink, it can be incorporated into our diet in several ways. But what about those peels? Most of us throw them away without a second thought but they actually have a lot of potential. How, you ask? From cosy home hacks to garden composting, you can enjoy the goodness in many easy ways. Let’s find out how you can use these orange peels in your daily life.

    Also Read: Don’t Throw Away The Orange Peel! Make A Delicious Soup With It

    Latest and Breaking News on NDTV

    Photo: iStock

    Here Are 5 Easy Ways To Use Orange Peels At Home

    1. Make A Natural Air Freshener

    Are you tired of chemical-laden air freshers? Then make a natural one using orange peels. Just add them to a pot of water with cinnamon and cloves, and let this concoction simmer. Within minutes, your home will smell like a cosy, citrusy dream. You can even add a dash of vanilla for extra warmth. Plus, it is chemical-free so you’ll have an eco-friendly home. Just simmer this concoction before your guests arrive to create a feel-good vibe for all.

    2. Say Hello To Fresh Skin With A DIY Scrub

    Why buy expensive scrubs when your kitchen has the solution? Just dry some orange peels and grind them into a fine powder. Mix it with honey or yoghurt and exfoliate your skin. It is perfect for removing dead skin cells from your face, leaving you with fresh, glowing skin. Plus, the natural oils in orange peels help brighten your skin over time (thanks to vitamin C). So, the next time you eat orange, dry the peels and make yourself a homemade scrub for some natural loving!

    3. Brew A Soothing Orange Peel Tea

    If you are feeling under the weather, orange peel tea can be a game-changer. Simply steep dried orange peels in hot water with some ginger and honey. Brew and drink hot. It is packed with antioxidants and vitamin C, which makes it perfect for those with winter flu. Plus, it is a great way to use up peels while enjoying a warm, flavourful drink. 

    Latest and Breaking News on NDTV

    Photo: iStock

    4. Make An Eco-Friendly Cleaner

    Ditch your harsh cleaners and say hello to the power of orange peel! All you have to do is soak orange peels in vinegar for two weeks and then strain the liquid into a spray bottle. This natural cleaner is perfect for removing grease, tackling stains, and leaving a fresh citrus smell behind. You can use it on kitchen counters, glass surfaces, or even to clean your bathroom. 

    5. Enrich Your Garden Compost

    If you have a green kitchen aim in mind, then orange peels can boost your compost. The acidity from the peels helps break down organic matter faster, making the compost richer and healthier for plants. Just chop the orange peels into small pieces before adding them to the compost. If you are worried about pests, don’t be. Orange peels are a natural repellent for ants. So, your compost won’t be compromised.

    Also Read:Believe It Or Not, This Luxury Bag Is Made Of Orange Peels

    Source link