hacklink hack forum hacklink film izle hacklink marsbahisizmir escortsahabetpornJojobetcasibompadişahbetjojobet

Tag: Recipe

  • Give A Flavourful Twist To Classic Miss Roti. Try This Chef-Special Achaari Missi Roti Recipe

    Give A Flavourful Twist To Classic Miss Roti. Try This Chef-Special Achaari Missi Roti Recipe

    Are you tired of the same old missi rotis? If you’re looking to add a burst of flavour and excitement to your meals, you need to try Achari Missi Roti. This delicious and easy-to-make recipe is a perfect blend of tangy, spicy, and nutty flavours, making it a standout dish that will tantalize your taste buds. Achari Missi Roti is a unique twist on the classic Indian flatbread, incorporating the flavours of traditional Indian pickles (achar). The combination of roasted besan (gram flour), aromatic spices, and tangy pickle masala creates a truly irresistible dish.

    Also Read: 5 Ways To Make Roti Even More Nutritious

    The recipe for this deliocus achaari missi roti was shared by chef Neha Daapak Shah on her Instagram handle. Let’s see how to make it. 

    1. In a bowl, combine the roasted besan, ghee, mustard oil, hing, coriander seeds, fennel, jeera, kalonji seeds, red chilli powder, turmeric powder, kasoori methi, salt, and black salt. Mix well until all the ingredients are evenly incorporated.
    2. Add enough roti or paratha atta to form a dough. Knead the dough until it becomes smooth and elastic.
    3. Divide the dough into equal-sized portions and roll them out into thin circles.
    4. Place a spoonful of the besan mixture in the centre of each rolled-out circle.
    5. Bring the sides of the dough together and seal tightly to form a small pouch.
    6. Roll out the filled dough into a thin circle again.
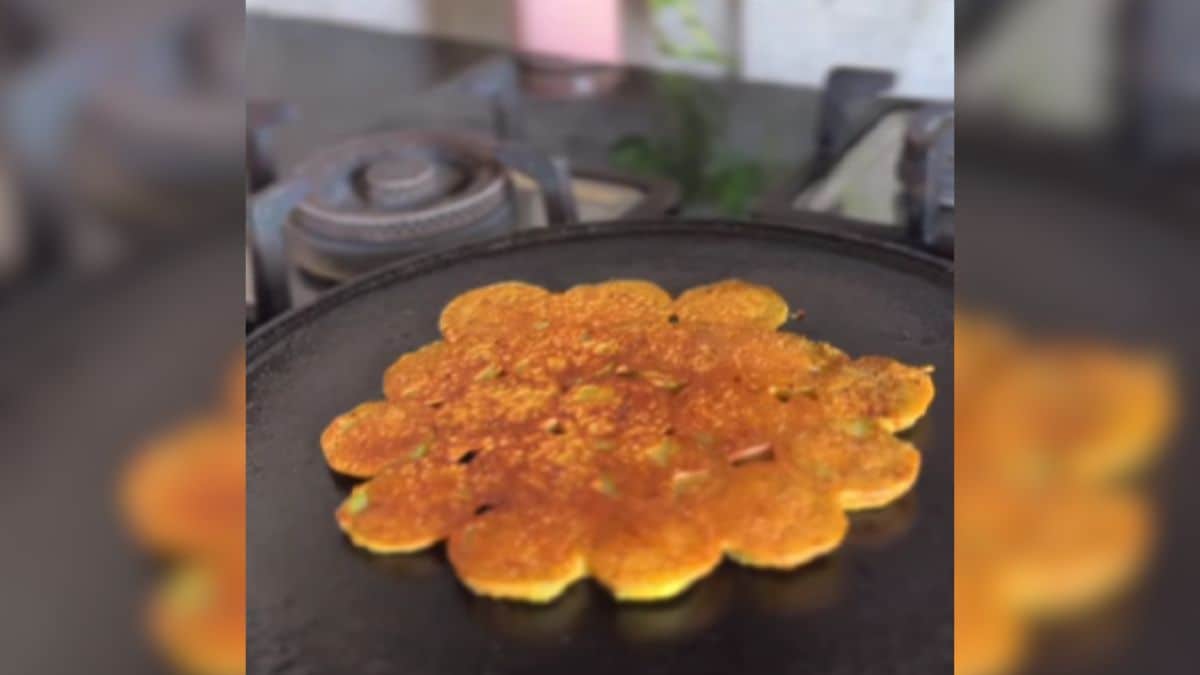
    7. Heat a tawa (griddle) over medium heat and cook the paratha on both sides until golden brown and crisp. You can add a little ghee to the tawa for extra flavour.

    Also Read: This Bajra Methi Missi Roti May Help Manage Blood Sugar Levels

    Watch the complete recipe video for achaari missi roti here:

    Tips for the Perfect Achari Missi Roti

    • Don’t Overfill: Make sure you don’t put too much filling in the paratha, or it might tear when cooking.
    • Remove Excess Dough: Before cooking, remove any excess dough from the top of the paratha to ensure even cooking.
    • Adjust the Spice Level: Adjust the amount of red chilli powder and black salt to suit your taste preferences.
    • Experiment with Fillings: You can customize the filling by adding other ingredients like grated paneer, chopped vegetables, or grated coconut.

    Health Benefits of Achari Missi Roti

    • Rich in Fibre: Besan, the main ingredient in this recipe, is a good source of fibre, which aids digestion and promotes satiety.
    • Nutrient-Dense: The various spices used in the filling add essential nutrients and antioxidants to the dish.
    • Gluten-Free: This recipe is suitable for those who are gluten-intolerant or follow a gluten-free diet.

    So, give this achaari missit roti a try and enjoy the taste of this flavorful delicacy! Also check out this recipe for achaari laccha parantha here. 

    About Neha GroverLove for reading roused her writing instincts. Neha is guilty of having a deep-set fixation with anything caffeinated. When she is not pouring out her nest of thoughts onto the screen, you can see her reading while sipping on coffee.


    Source link

  • Got Leftover Idlis? Transform Them Into These Delectable Curd Idlis (Recipe Inside)

    Got Leftover Idlis? Transform Them Into These Delectable Curd Idlis (Recipe Inside)

    Do you love curd? If so, we’re sure you’ve tried incorporating it into your dishes, haven’t you? Whether it’s a bowl of curd rice, dahi bhallas, or chaat, curd has found its way into many popular dishes. But have you ever tried curd with idlis? Yes, you heard that right! You’ll be surprised to know that the combination of curd and idlis works like magic, and these delicious curd idlis are proof. Once you make them at home, you’ll wonder why you never tried this combination before. And who knows, you might just forget other classic curd-based dishes. The recipe for these curd idlis was shared by the Instagram page @chieffoodieofficer. Without further delay, let’s dive straight into the recipe.
    Also Read: How To Make Colorful Idlis At Home Using 5 Natural Colours

    Add image caption here

    Photo Credit: Getty

    What Makes Curd Idli So Unique?

    Also known as thayir idli, curd idlis are a staple in South Indian households. You can make the idlis from scratch or even use leftover idlis to make this dish. They are topped with refreshing curd infused with a spicy tadka, making them truly one-of-a-kind. Plus, they are incredibly easy to prepare and will be ready in just 5 minutes. Idli lovers, don’t miss trying these delicious idlis!

    Is Curd Idli Good For Health?

    Absolutely! Idlis are healthy on their own, and when paired with curd, their nutritional value gets a boost. Curd idlis are low in calories, light on the stomach, and make for a perfect evening snack. Additionally, they are high in protein, so they can also be a part of your weight-loss diet.

    How To Make Curd Idli At Home | Curd Idli Recipe

    To make these delicious idlis, all you need are leftover idlis and five minutes of your time. Start by adding salt and sugar to a bowl of curd. Mix well and set aside. Next, prepare the tempering by heating oil in a pan over low-medium heat. Add mustard seeds, urad dal, dried red chillies, curry leaves, and a pinch of hing. Cook for a few minutes, then pour the tadka into the curd bowl and mix well. Now, arrange the idlis on a plate and top them with the prepared dahi tadka. Garnish with fresh coriander leaves and a sprinkle of jeera powder and red chilli powder. Chill in the refrigerator for a while before serving.
    Also Read: Are Idlis A Good Source Of Protein? This Food Expert Says…

    Watch the complete video for dahi idli below:

    Looks delicious, doesn’t it? Try making these mouth-watering idlis at home and share your experience with us in the comments section below.


    Source link

  • How To Make Instant Amla Achar In Just 15 Minutes (Recipe Inside)

    How To Make Instant Amla Achar In Just 15 Minutes (Recipe Inside)

    Pickles (or ‘achars’) hold a special place in Indian culinary traditions. From adding a tangy punch to our daily meals to enhancing the taste of our elaborate dishes, achars are a staple in every Indian household. No meals feel truly complete without a spoonful of that spicy and tangy condiment. Typically, achars take a long to ferment and dissolve in flavours which is why they are a winter delicacy. But what if we tell you that you can satiate your achar cravings with an instant, tangy and nutritious pickle? Yes, you read that right! Here, we bring you an easy recipe of instant amla achar which is super delightful and easy to make. So, what are you waiting for? Let’s dive into some common questions before learning the recipe!

    Also Read: 5 Fun Ways To Include Amla In Your Daily Diet For Strong Immunity

    Latest and Breaking News on NDTV

    Photo Credit: iStock

    What Are The Health Benefits Of Eating Amla Achar?

    Eating Amla achar can do wonders for your body. Its star ingredient Amla, also known as Indian gooseberry, is packed with vitamin C which can boost your health and immune system. This is especially beneficial for monsoon – when we are prone to contracting various kinds of bacteria. Moreover, this achar has several spices that have antioxidant properties that can support overall well-being. What’s more? Amla is packed with vitamin A which can help strengthen your hair roots, so say goodbye to hair fall and say hello to thick and shiny hair.

    How To Keep Amla Achar Fresh For Long?

    While it may sound unusual, to keep your amla achar fresh for long, store it in an airtight container in a refrigerator. This will help prevent moisture and air from spoiling the pickle. Moreover, make sure to use a clean spoon every time you take some pickle out, to avoid contamination. If you want to increase your instant amla achaar’s shelf life, add a layer of oil on top of the pickle to keep the air out of it. 

    Latest and Breaking News on NDTV

    Photo Credit: iStock

    Can You Add Other Ingredients To Your Amla Achar?

    Absolutely! You can add a variety of ingredients to your instant amla achar to experiment with the flavours. For example, if you want to increase its tanginess, add a little bit of lemon juice to it. If you want to balance the tanginess, add a little bit of jaggery or sugar to it. You can also experiment with the flavours by adding nigella seeds or fennel seeds to add a different taste note to your achar.

    Instant Amla Achaar Recipe | How To Make Instant Amla Achar 

    Making amla achar at home is pretty simple. This recipe was shared by digital creator Nitya Hegde (@finefettlecookerys) on Instagram. To make this:

    1. Prepare Amlas

    Start by cleaning the amlas and set them aside. Heat a pot. To it, add water and salt and mix well. Now add amlas to this and let it cool completely. 

    2. Make Achaar Powder

    Take a pan and put all the spices – cumin seeds, mustard, fenugreek seeds, cloves, peppercorn, star anise, hing, and nutmeg – in it. Dry roast them until aromatic. Remove from heat and let them cool down completely. Then ground them into a fine powder.

    3. Combine ingredients

    In a large bowl, remove the amla seeds from the amla. Now add the ground masala powder and mix well. Next, slit the bird chilli and add it to the mixture. Gradually, pour the salt water used to cook the amla into the mixture, adding little by little to make sure the masala is evenly distributed. Store it in an airtight container in the refrigerator, and enjoy!

    Watch the full video below:

    Also Read: Amla Tea For Weight Loss: How To Make This Ayurvedic Drink For Fat Burn

    So, make this delightful achar recipe at home and let us know in the comments below if you like it or not.


    Source link

  • 5 Powerful Ingredients to Regulate Your Periods – Plus, A Simple Tea Recipe To Try

    5 Powerful Ingredients to Regulate Your Periods – Plus, A Simple Tea Recipe To Try

    Missed, delayed or erratic periods or abnormal bleeding patterns are categorised as irregular periods. There can be many causes associated with irregular menstrual cycle such as family history, menopause, physical stress, psychological stress, smoking or medication side effects. There are several ways to help you regulate your periods. In a recent Instagram video, Hormone and Gut Health Coach Manpreet Kalra shared a powerful tea recipe to regulate hormonal imbalance. Further, she suggested lifestyle and dietary changes to improve the menstrual cycle.

    Here Are 5 Powerful Ingredients Used To Make Tea For Irregular Periods:

    1. Methi Seeds: Contain phytoestrogens which regulate hormonal imbalance

    2. Cumin: Stimulates and regulates your period flow

    3. Saffron: Reduces menstrual cramps and discomfort

    4. Coriander Seeds: Reduces menstrual pain

    5. Jaggery: Helps maintain regular periods

    How To Make Super Tea For Periods | Health Drink Recipe For Irregular Periods

    The steps to make this super tea are quite easy. Take a pan and add 2-3 strands saffron, 1 tsp methi seeds, 1 tsp coriander seeds, 1 tsp jeera and 200ml water. Boil it all till the concoction is reduced to half. Add 1 tsp jaggery. Your super tea is ready.  
    Also Read: 4 Foods You Should Avoid If You Have PCOS

    More Diet And Lifestyle Tips to Regularise Periods:

    1. Wake Up Early

    Wake up to sunlight as it helps in balancing your cortisol levels.

    2. Period Health Drink

    Consume the tea 2-3 days before your period date. Drink it in the ‘Malasana’ posture (squatting pose with the feet together and the back rounded) early in the morning.

    3. Protein-Rich Diet

    Have proteinaceous meals as this helps to improve your insulin sensitivity.

    4. Workout

    Do strength training 3-4 times per week and cardio 2-3 times per week to improve menstrual flow.

    5. Eat Clean

    Avoid processed foods and refined sugar as these may disrupt your hormones.
    Also Read: Why You Need To Add Pineapple to Your Period Routine

    6. Meal Timings

    Keep a gap of 12-14 hours between dinner and breakfast as it helps in detoxification.

    7. Rest

    Make sure to sleep for 8 hours. Avoid using screens an hour before sleeping. Do yoga nidra before bed to improve sleep quality.

    8. Dry Fruit Intake

    Have 3-4 soaked munakka before bed to provide relief from period cramps.

    Follow these tips to help regulate your menstrual cycle.

    Note: It is important to consult your doctor before making any crucial dietary changes, especially for any exisitng health conditions.


    Source link

  • Ridge Gourd Dosa: This Dosa Recipe Is The Most Delightful Way To Consume Turai

    Ridge Gourd Dosa: This Dosa Recipe Is The Most Delightful Way To Consume Turai

    Some vegetables often find themselves in the “least favourite” category in many households. Even though they have several health benefits, they are often repelled due to their texture, taste, and appearance. Ridge Gourd, known as Turai in Hindi, is one such vegetable. Although this vegetable is packed with nutrients, its spongy texture and slightly bitter taste make people frown. But, what if we tell you there’s an easy and delicious way to add this humble vegetable to your diet? If you are convinced, then we have an easy recipe for your – Ridge Gourd Dosa! In Kannada, this recipe is known as Heerekai Dosa, and is a delightful way to add this veggie to your diet! Want to know how to make it? But before that, let’s dive into some basic questions related to the recipe.

    Also Read: Make Your Boring Vegetables Yummy: 3 Tasty Yet Healthy Turai (Ridge Gourd) Dishes To Try

    Latest and Breaking News on NDTV

    Photo Credit: iStock

    What Are The Health Benefits Of Ridge Gourd?

    If you have scrolled till here, then it is possible that you might be interested in making this recipe at home. Well, let’s understand how eating ridge gourd can benefit your body. Ridge gourd, also known as Turai, is low in calories and high in nutrition so you can eat it daily. Known for its cooling properties, eating ridge gourd can help keep your digestive system healthy, thanks to high dietary fibres. This, in turn, also helps keep constipation at bay. Moreover, the vitamin C, zinc, water content and antioxidants present in this vegetable can do wonders for your skin and overall body. 

    Which Vegetables Can You Use In Place Of Ridge Gourd For This Dosa?

    While this recipe tastes best with ridge gourd (turai), you can easily increase the intake of other “not so favourite” vegetables with this recipe. Instead of Ridge Gourd, you can use zucchini, bottle gourd, or even slices of cucumber to get the same texture and mild flavour. Since they can be sliced and dipped, they would be perfect for experimentation in this recipe.

    How To Ensure That The Ridge Gourd Dosa Turns Out Crispy?

    If you want your homemade ridge gourd dosa to be super crisp, make sure to get the batter right. The majority of taste in this dish relies solely on how you prepare the batter. It should be smooth and have a pouring consistency, meaning it shouldn’t be too runny or too thick. If it’s too runny, it will turn out to be moist. If it’s too thick, it will not spread well on the pan, and turn out to be a thick and chewy dosa. Also, make sure to cook this dosa on medium heat to get the desired crispiness.

    Latest and Breaking News on NDTV

    Ridge Gourd Dosa Recipe | How To Make Ridge Gourd Dosa At Home

    To make ridge dosa at home is pretty simple. This recipe was shared on Instagram by user @keertidacooks. To do this, follow these steps:

    1. Soak Lentils

    Start by preparing the batter for this dosa. Soak raw rice, urad dal, chana dal and methi seeds together for 3-4 hours. 

    2. Make The Batter

    Strain the soaked ingredients and put them in a blending jar. Now put other ingredients – coconut, coriander seeds, turmeric powder, cumin seeds, bedgi chillies, tamarind pulp, and jaggery – in the blender. Add ½ cup water and grind the ingredients into a smooth batter. If you feel like the batter is too thick, add a bit of water and blend again.

    3. Cut Ridge Gourd

    Once you are satisfied with the consistency of the batter, set it aside. Wash and peel the ridge gourd and then cut it into medium slices. These should be at least 2 cm thick so that they cook evenly.

    4. Cook Ridge Gourd

    Take a cast-iron pan and grease it. Gently dip each slice into the batter and arrange them to make an approximate circle. To fill in the spaces, pour some batter where needed. Drizzle some oil and then cover and cook for 3-4 minutes. Flip and cook on the other side. Serve hot with butter or coconut chutney!

    Watch the full recipe below:

    Also Read: Leftover Turai Peels? Turn Them Into This Healthy And Tasty Recipe

    So, try this easy dosa recipe at home to reap the maximum benefits of this Ridge Gourd!


    Source link

  • Say Yay To Lauki With This South Indian Sorakaya Pachadi Recipe – Try It Now!

    Say Yay To Lauki With This South Indian Sorakaya Pachadi Recipe – Try It Now!

    Let us all accept that the very idea of lauki ki sabzi is off-putting. In fact, as kids, most of us either sneakingly dumped it in the waste bin or tried avoiding the meal altogether. But nothing doing, you love it or not, lauki (or bottle gourd) has always been a part of the quintessential Indian diet. Why you wonder? It is because of the goodness the vegetable brings along. It is hydrating, enriched with minerals, vitamins and antioxidants and helps boost metabolism, burn fat and lower cholesterol levels. Hence, we constantly search for unique recipes to make lauki interesting for all. And guess what, we recently came across one such dish that will make you fall for the vegetable instantly. It’s called sorakaya pachadi.

    Sorakaya Pachadi, The Ultimate Lauki Chutney To Try:

    To put it simply, sorakaya is bottle gourd (lauki) and pachadi literally means ‘pounded’. Popular in Andhra Pradesh and Telangana, it is a fresh, hand-pounded chutney that is usually consumed with rice. Pachadi is also consumed in other South Indian states, but if you delve in deep, you will find every region having its uniqueness in the recipe. For instance, Kerala enjoys pachadi raw and fresh, while people in Andhra Pradesh and Telangana, al dante the vegetables before pounding them.

    Alongside, sorakaya pachadi (South Indan bottle gourd chutney) is super healthy as well. The dish keeps the nutrients of the vegetable intact, with inclusion of some added benefits of the spices and other ingredients.

    Also Read: 5 South Indian Chutney Recipes You Must Try

    Add image caption here

    Photo Credit: iStock

    The Easiest Sorakaya Pachadi Recipe To Replicate At Home:

    As mentioned earlier, a pachadi recipe finds unqiueness in every region and every household. During our search for a simple and easy to replicate recipe, we came across a video on social media that looked delicious and perfect to enjoy with rice, roti and paratha. The recipe video has been shared on Instagram by food vlogger Vantaamrutham. Let’s take a look.

    • Heat oil in a pan.
    • Saute cumin, green chillies and peanuts. Keep aside.
    • Heat some more oil and cook few garlic gloves with diced lauki, tomatoes and turmeric powder for low-medium flame.
    • Cook for eight to ten minutes on low-medium flame for 80-90 percent.
    • Add tamarind and switch of the flame.
    • Put everything in a blender and blend coarsely. You can hand pound the chutney, with salt.
    • Next, prepare a tadka with seeds mix, curry leaves, hing and red chilli and add the chutney.
    • Mix everything well, garnish with coriander leaves and your pachadi is ready.

    Watch the detailed Sorakaya Pachadi recipe video here:

    Also Read: How To Make South Indian-Style Pachadi – Find The Recipes For 5 Types Of Pachadi

    For more such delicious bottle gourd recipes, click here.

    About Somdatta SahaExplorer- this is what Somdatta likes to call herself. Be it in terms of food, people or places, all she craves for is to know the unknown. A simple aglio olio pasta or daal-chawal and a good movie can make her day.


    Source link

  • Making Samosa At Home Has Never Been Easier! Try This 10-Min Leftover Bread Samosa Recipe

    Making Samosa At Home Has Never Been Easier! Try This 10-Min Leftover Bread Samosa Recipe

    When it comes to snacks, we all have certain favourites. Then, there are some snacks that are equally loved by all – one such snack is the quintessential samosa. Pastry dough shaped into triangles, stuffed with a spicy aloo filling, and deep fried – it is an absolute delight to indulge in. However, whenever we crave samosa, we usually order or visit the nearest vendor in our locality. After all, why go through the tiresome process of preparing it at home? But wait – what if we told you that you could make samosa at home in all of 10 minutes? Yes, you heard that right! It’s entirely possible, and the results are truly spectacular. This unique samosa is made with leftover bread – the recipe of which was shared by the Instagram page @picklesandwine.
    Also Read: A Smart Way To Enjoy Street Food! 5 Tips To Make Samosas Healthier

    What Is So Unique About Bread Samosa?

    The dough of this samosa is prepared with bread slices instead of regular dough. This minimises the lengthy process of preparing the dough, thus making it ideal for times when you’re looking for a quick snack. Plus, this bread samosa is air-fried instead of using the traditional deep-frying method, thereby reducing the calorie count by a significant amount.

    How To Ensure Bread Samosa Turns Out Crispy?

    To make perfectly crispy bread samosas, there are a few things you need to keep in mind. Firstly, ensure you don’t overfill the samosa with the aloo filling. This can easily cause it to crack, resulting in uneven cooking. Secondly, avoid placing too many samosas in the air fryer basket at once. By doing so, there is a high chance of them sticking together, thus altering the texture. Lastly, make sure to cook the samosas for a sufficient amount of time, or else the bread won’t be as crispy.

    How To Make Samosa With Leftover Bread | Easy Samosa Recipe

    Making this samosa at home is incredibly easy. Start by preparing the filling for the samosa. For this, heat oil in a pan and add cumin, chopped ginger, and green chillies. Saute well. Now, add the boiled peas and potatoes along with red chilli powder, amchoor powder, cumin powder, coriander powder, black pepper, salt, and fresh coriander. Keep aside. Next, cut the edges off the bread slices and roll them out using a rolling pin. Cut each bread slice into two halves, and fold it in such a way that it makes a cone shape. Stuff the bread cone with the prepared aloo filling and air fry in a preheated air fryer for about 8 to 12 minutes until golden brown and crispy. Serve hot with pudina chutney and enjoy!
    Also Read: Samsa: The Fascinating Story Of Uzbekistan’s Very Own Baked Samosa

    Watch the complete recipe video below:

    Making samosa at home has never been easier! So, why wait? Try making this quick and easy snack for your next chai session and indulge in its goodness. Do let us know how you found its taste in the comments below. Happy Snacking!


    Source link

  • Craving Choco Lava Cake? Whip Up This Easy, Eggless Recipe In Just 20 Minutes!

    Craving Choco Lava Cake? Whip Up This Easy, Eggless Recipe In Just 20 Minutes!

    Choco lava cake is one of the most drool-worthy desserts out there. Soft and gooey chocolate cake oozing with melted chocolate – this sweet treat has the power to make just about anything right. Whether you’re feeling sad or low on energy, a serving of this can provide the ultimate comfort you need. As easy as it is to finish it off, making it is a different ball game altogether. Due to this, many avoid making it at home and prefer ordering in or eating it at a restaurant. But hey, what if we told you that making choco lava cake could be a breeze? We recently came across a recipe for this delightful dessert that you can prepare in just under 20 mins. Plus, you don’t require any fancy ingredients or equipment to make it – all you need is a katori. Excited to try it out? Read on!
    Also Read: 3 Quick And Easy Methods For Baking The Perfect Chocolate Cake At Home

    Latest and Breaking News on NDTV

    Photo Credit: Getty

    How To Ensure Choco Lava Cake Turns Out Soft And Gooey?

    The soft and gooey texture of choco lava cake is what makes it so loved. To achieve this, ensure that the ingredients you are using are at room temperature. By doing so, they’ll blend together easily, resulting in a smooth, velvety batter. Also, remember to always preheat the kadhai.

    Can You Use Eggs To Make Choco Lava Cake?

    Absolutely! This recipe for this choco lava cake is eggless; however, don’t hesitate to add eggs if you feel like it. Add them while combining the sugar and melted butter, and ensure you whisk the mixture well. For this particular recipe, you’ll require just one egg. If you wish to double the recipe, modify the quantity of the eggs accordingly.

    How To Make Choco Lava Cake In A Katori | Choco Lava Cake Recipe

    The recipe for this mouth-watering choco lava cake was shared by baker and author Shivesh Bhatia on Instagram. Start by setting a kadhai on a low-medium heat and spread a layer of salt at the bottom of the kadhai. Place a small stand in the centre and place a plate on it. Close the lid of the kadhai. Let it preheat for about 10 mins. In a bowl, combine the sugar and melted butter. Pour in the warm milk and mix until well combined. Add the dry ingredients – flour, cocoa powder, baking powder, and baking soda. Mix until a smooth batter forms. Divide the batter into 3 katoris and place a big chunk of chocolate in the middle. Place the katoris in the preheated kadhai and cook them for 12-15 mins. Once cooked, serve warm with a dusting of icing sugar.
    Also Read: Chocolate Cake In 4 Minutes! Don’t Believe Us? Try This Recipe And Decide

    Watch the complete recipe video here:

    Looks delicious, doesn’t it? Try making this easy choco lava cake and impress your family with your baking skills.


    Source link

  • Brides, Get That Glow! This 4-Ingredient Drink Recipe Is Your Skins Best Friend

    Brides, Get That Glow! This 4-Ingredient Drink Recipe Is Your Skins Best Friend

    Wedding celebrations could be fun and hectic at the same time. While your excitement is at its peak to begin a new journey, you need months of planning to put it all together. Jewellery, costume, venue, decoration, food menu and more – the list is super long and you just don’t want to compromise anything. But what a bride can’t ignore amidst all is a proper beauty regime. If you have your D-Day in the next few months, then surely you have started the bridal skincare routine by now. After all, we all want that extra glow on that very day. Right? Trust us, it can’t be achieved with just topical skin care. You heard us.

    To get that shine and glow from within, you need to heal the skin with the right kind of diet and lifestyle. Proper hydration, the right kind of meals and regular exercise can help you achieve your goal seamlessly. Here, we found a drink concoction that promises a clear glass skin to all the brides-to-be on their ‘Big Day’.

    Want That Bridal Glow? Here’s How This Beauty Drink Will Help You Get That:

    The drink recipe has been shared by nutritionist Richa Gangani on her official Instagram handle. “Say hello to clear and glowing glass-like skin in just 21 days,” she writes while mentioning that this drink includes four basic ingredients that are high in antioxidants, vitamin C and vitamin K.

    All you need to do is blend beetroot, carrot, curry leaves, and amla, and drink one glass of it every day. You can either strain the drink or have it as is, with the fibre, for better metabolism and digestion. That’s it.

    Also Read: Say Goodbye to Dull Skin! This Simple Pink Drink Is Your One-Stop Solution For Healthy Glowing Skin

    Here’s Why This Drink Is Just What You Need For Flawless Skin:

    1. Because Beetroot – Rich In Vitamin C:

    Beetroot is enriched with vitamin C, which can help prevent wrinkles and dry skin. It also contains some amount of lycopene and squalene, which may help reduce skin ageing, leaving you with an inner glow.

    2. Carrots – They Improve Elasticity:

    Carrot contains beta carotene, vitamin C, and vitamin E that help detoxify your skin, prevent sunburn and improve skin elasticity, along with a natural glow.

    3. Curry Leaves For Antioxidants:

    The antioxidants and vitamin C in curry leaves are known to aid healthy complexion. Besides the leaves also contain bioactive compounds that may protect your skin from oxidative damage, promoting cell rejuvenation.

    4. Amla Promotes Collagen Production:

    Amla is a potent source of vitamin C that promotes collagen production – a vital component to maintaining skin’s elasticity and firmness. Besides, it is also known to reduce wrinkles, fine lines and ageing spots.

    So what are you waiting for? Include this four-ingredient beauty drink in your pre-wedding regime and enjoy healthy skin and overall good health. But always remember, moderation is the key! All the best for your ‘Big Day’.


    Source link