hacklink hack forum hacklink film izle hacklink marsbahisizmir escortsahabetpornJojobetcasibompadişahbet

Tag: Spicy

  • How To Make Thecha Paneer: A Spicy Paneer Dish That Will Leave You Asking For More

    How To Make Thecha Paneer: A Spicy Paneer Dish That Will Leave You Asking For More

    Fiery and flavourful, thecha is one Maharashtrian condiment that ranks on top for spice lovers. Traditionally, thecha is enjoyed as a side dish with bhakri, dal-rice, or even parathas as its bold flavours can amp up any meal. But what if we told you that thecha’s iconic taste could also be made into a gravy dish? Yes, you read that right! Here, we bring you the recipe for thecha paneer – a delightful combination of creamy paneer and spicy thecha. This recipe is perfect for family dinners or a quick treat and is the ultimate way to enjoy the spice-laden goodness of thecha. Are you ready to learn how to make this dish at home? Then roll up your sleeves and read on to know more.

    Also Read:How to Make Goli Idli: A Quick And Easy Recipe For Idli Lovers
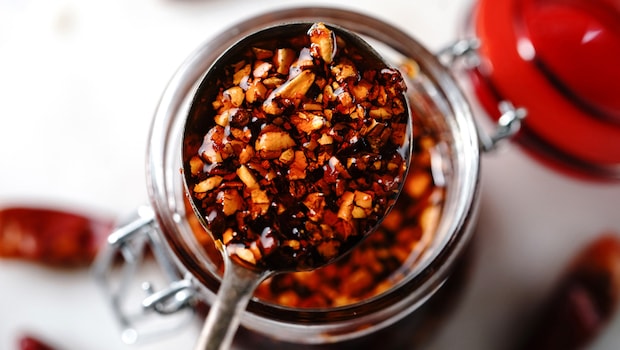
    Latest and Breaking News on NDTV

    Photo: iStock

    What Makes Thecha Paneer A Must-Have?

    Thecha paneer is the perfect mix of simple ingredients and indulgence. This recipe has tons of flavours and a creamy texture which makes it ideal for everyday meals or even special occasions. It is super easy to make but has a complex layer profile that makes it feel like a gourmet dish. Plus, thecha paneer is loved by everyone – kids love the paneer’s softness while the bold and spicy kick of the gravy makes it an adult favourite. You can use your pre-made thecha for this recipe too. So, go on and try this lip-smacking gravy dish without much hassle.

    What Can You Pair With Thecha Paneer?

    Thecha paneer is extremely versatile which is what makes it a perfect side for a variety of dishes. You can enjoy this dish with fresh rotis, buttery naans or even flaky parathas to let that creamy, spicy gravy shine. You can also serve it with steamed rice or jeera rice for a hearty and comforting meal. If you want to tone down the heat levels, pair it with fresh onion and cucumber salad and tantalise your taste buds.
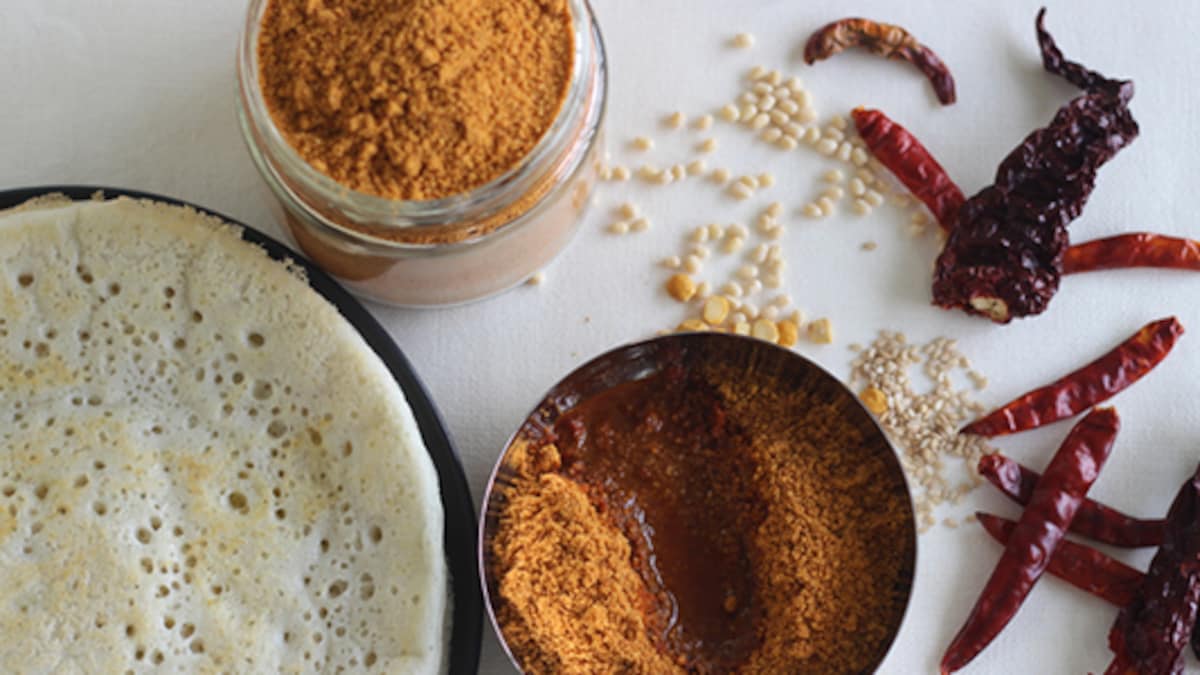
    Add image caption here

    Photo: Pixabay

    How To Make Thecha Paneer | Thecha Paneer Recipe 

    Making thecha paneer at home is pretty simple. This recipe was shared by content creator @shraddha_palande_. To make this,

    1. Prepare Paneer

    Take a paneer slab and cut it into small pieces. Heat some oil in a pan and fry the pieces until they are crisp and brown from both sides. Transfer to a plate.

    2. Prepare Thecha

    In the same pan, add oil along with jeera, garlic, green chillies, sesame seeds, dry coconut and fresh coriander leaves. Cook for 3-4 minutes. Cool it down and transfer it to a mixer grinder. Make a fine paste of it.

    3. Prepare Curry

    Now, heat the pan and pour in some oil. Add sliced onions and cook until it is translucent. Add the prepared thecha paste and water to the pan and mix well. Spice it up with turmeric, coriander powder and salt. Cook for 3-4 minutes. Add fried paneer and fresh green chillies. Top it up with garam masala and give it a good mix. Serve hot!

    Watch the full video below:

    Also Read:This Bajra Ki Kadhi Is So Delicious, You’ll Forget All About Regular Kadhi (Recipe Inside)

    Will you try this Thecha Paneer recipe at home? Let us know in the comments below.


    Source link

  • How To Make Chilli Garlic Momos: A Quick Recipe For A Spicy Delight

    How To Make Chilli Garlic Momos: A Quick Recipe For A Spicy Delight

    Momos are the ultimate snack fix. Whether you like them steamed, tandoori, pan-fried, or fried, they hit the spot every single time. They have totally won our hearts, and honestly, we can’t get enough. Pair them with creamy mayo or fiery chutneys, and it’s a whole vibe. With the weekend right around the corner, why not treat yourself to something extra delicious? Forget the usual paneer or chicken momos – we are talking about momos dunked in a bold, chilli garlic sauce. And guess what? Instagram page @picklesandwine has the recipe that’ll have you drooling.
    Also Read: 5 Tips For Making Paneer Momos That Will Leave You Drooling From The First Bite

    Add image caption here

    Photo Credit: Getty

    Why Chilli Garlic Momos Are A Total Game-Changer

    Chilli garlic momos are not your regular dumplings. They’re next-level amazing, and you can make them with both veg and non-veg fillings. Here’s why you’ve got to try them:

    1. Super Easy To Make

    Think making momos is complicated? Nope! With this recipe, you’ll have them ready in just 15-20 minutes.

    2. Bursting With Flavours

    These momos are packed with sweet, spicy, and tangy goodness that’ll make every bite a party in your mouth.

    3. Perfect Party Snack

    Need a snack to wow your guests? Chilli garlic momos are the answer. They’re so good that everyone will ask you for the recipe.

    Pro Tips For Crispy, Perfectly Cooked Chilli Garlic Momos:

    These momos are pan-fried to golden perfection, but the trick is in the technique. Want them just right? Here’s how:

    • Keep the flame on low-medium for even cooking.
    • Wait until they turn that perfect golden brown shade.
    • Don’t overcrowd the pan; give your momos space to shine.

    How To Make Chilli Garlic Momos At Home

    Making chilli garlic momos is easier than you think! You’ll need just a few ingredients and less than 15 minutes. Here’s the breakdown:

    • Heat some oil in a pan and place the momos in it.
    • Once they’re golden at the bottom, add a splash of water and cover with a lid to steam.
    • After a few minutes, uncover and turn off the flame.
    • For the sauce, heat oil in another pan and add garlic, green chillies, schezwan chutney, soy sauce, red chilli sauce, vinegar, ketchup, and salt. Cook for a minute or two.
    • Toss in the pan-fried momos, mix well, and garnish with sesame seeds and spring onion greens.
    • Serve them hot, and watch them disappear!

    Also Read: Give Your Chicken Momos A Tandoori Twist With This Interesting Recipe

    Check out the full video here:

    Feeling hungry already? This is your sign to give this recipe a shot and make your weekend extra tasty! For more momo inspiration, click here.


    Source link

  • Grilled Pineapple Recipe: A Must-Try Sweet And Spicy Treat For The Taste Buds

    Grilled Pineapple Recipe: A Must-Try Sweet And Spicy Treat For The Taste Buds

    Pineapple, with its tropical sweetness and tangy flavour, is a fruit that is loved around the world. While it is commonly enjoyed fresh or in fruit salads, grilling pineapple is a unique and exciting way to elevate its flavours. Grilled pineapple, with its caramelized edges and smoky undertones, offers a perfect balance of sweetness and spice. When combined with a few simple seasonings, it becomes a mouthwatering treat that will leave you craving more. Whether you’re preparing it for a summer barbecue, a healthy snack, or as a dessert, grilled pineapple is sure to impress. We found this recipe on the Instagram page ‘MasterChef Gurkirat Singh’. Let’s see how to make it. 

    Also Read: 10 Best Pineapple Recipes

    How to Make Grilled Pineapple I Grilled Pineapple Recipe

    Grilled pineapple is easy to prepare, requiring minimal ingredients and just a few steps. Here’s what you’ll need:

    Start by peeling the pineapple and cutting it into thick slices. You can also cut it into rings if you prefer. Make sure to remove the core, as it’s tough to eat and not as flavorful as the rest of the fruit.

    In a small bowl, mix the red chilli powder, cumin powder, chaat masala, and salt. These spices will give the pineapple a delightful kick, enhancing its natural sweetness with savoury, tangy, and slightly spicy notes. Sprinkle the spice mix evenly over both sides of the pineapple slices and sprinkle lemon juice. 

    Preheat your grill or grill pan over medium heat. In this video, the pineapple is grilled in a regular sandwich maker! Place the pineapple slices on the grill, and cook for 3-4 minutes on each side, or until grill marks form and the pineapple becomes slightly caramelized. The heat will help bring out the natural sugars in the pineapple, resulting in a perfect balance of sweetness and smokiness.

    Serve and Enjoy: Serve the grilled pineapple slices as a standalone snack, a side dish, or even as a topping for ice cream or yoghurt. The smoky, spicy pineapple pairs beautifully with a variety of other flavours, making it a versatile addition to any meal.

    Watch the complete recipe video below:

    Here Are 6 Benefits of Pineapple:

    Not only is grilled pineapple a treat for your taste buds, but it also offers several health benefits.

    1. Rich in Vitamin C

    Pineapple is an excellent source of vitamin C, which is essential for a strong immune system, healthy skin, and overall good health. Just one cup of fresh pineapple provides more than 100% of your daily recommended intake of vitamin C. This powerful antioxidant helps protect the body against free radicals, boosts collagen production for skin elasticity, and supports the immune system in fighting off infections.

    2. Aids Digestion

    Pineapple contains bromelain, a mixture of enzymes that aid in the digestion of proteins. Bromelain helps break down protein molecules, making it easier for the body to absorb nutrients from food. Consuming pineapple regularly may promote better digestion, reduce bloating, and alleviate indigestion or discomfort after heavy meals.

    Also Read: 5 Quick And Easy Grilled Chicken Snacks You Must Try

    3. Supports Heart Health

    Pineapple is also a heart-healthy fruit due to its high content of antioxidants, fibre, and potassium. Antioxidants help reduce inflammation, which can protect the heart and blood vessels from damage. The fibre content in pineapple helps regulate cholesterol levels, and the potassium content supports healthy blood pressure. Regular consumption of pineapple, combined with a balanced diet, can support cardiovascular health.

    4. Boosts Immunity

    With its high vitamin C content, pineapple plays a crucial role in strengthening the immune system. Vitamin C is known to stimulate the production of white blood cells, which help fight off infections and protect the body from diseases. Bromelain also has anti-inflammatory properties that can help reduce symptoms of colds, allergies, or sinus congestion, making pineapple a great fruit to incorporate into your diet during flu season.

    5. Promotes Skin Health

    The vitamin C in pineapple is not only beneficial for internal health but also for external beauty. Vitamin C helps reduce wrinkles, promotes collagen production, and improves skin elasticity, making your skin look younger and more radiant. Additionally, the bromelain enzyme in pineapple has anti-inflammatory and skin-healing properties, making it great for reducing redness, swelling, and skin irritation when applied topically.

    6. Aids in Weight Loss

    Pineapple is low in calories and high in fibre, making it an ideal fruit for anyone looking to lose weight or maintain a healthy weight. The fibre helps keep you full for longer, reducing the chances of overeating. Additionally, bromelain is believed to aid in fat digestion, helping to break down fats and proteins more efficiently. By incorporating pineapple into a balanced diet, you can enjoy a nutritious, filling snack that supports weight management.

    So grab a ripe pineapple, and enjoy this flavorful, healthy treat today!


    Source link

  • What Is The Best Time To Eat Spicy Food? Heres What You Need To Know

    What Is The Best Time To Eat Spicy Food? Heres What You Need To Know

    Our Indian food scene feels incomplete without a fiery kick. Imagine a bowl of chicken curry with a dash of chilli or the comforting heat of a well-made biryani blended with spices. Spices don’t just enhance flavour; they evoke emotions and nostalgia. From the smoky, peppery tones of Chettinad chicken to the fiery punch of bhut jolokia chutney – our love for spicy food is undeniable. But beyond its taste and thrill, have you ever wondered about the best time to enjoy these hot dishes? Whether you love bold, spicy flavours or just a hint of heat, knowing the right time and state to indulge in can make all the difference. Let’s dive into how spicy food interacts with your body.

    Also Read: Love Spicy Food? Try These 7 Spicy Chicken Curries For Flavourful Meal

    Latest and Breaking News on NDTV

    Photo: iStock

    Is Spicy Food Healthy?

    Good news for spice lovers: spicy food isn’t just tasty but also packs several health benefits:

    1. Boosts Immunity

    The United States Department of Agriculture (USDA) highlights that green and red peppers are rich in vitamins like vitamin C, which strengthens the immune system and wards off common illnesses.

    2. Aids Weight Loss

    Want to rev up your metabolism and burn fat faster? Nutritionist Anshul Jaibharat says spicy food can help, as it enhances satiety and curbs binge eating. So, enjoy your masaledaar meals guilt-free!

    3. Reduces Body Pain

    Did you know spicy food can reduce pain? Capsaicin decreases neurotransmitters that send pain signals to the brain.

    4. Good For Heart

    While spicy food can cause heartburn, it also promotes heart health. Capsaicin lowers bad cholesterol, reducing inflammation.

    5. Boosts Mood

    Ever felt happier after eating spicy food? That’s because it boosts serotonin, the “feel-good” hormone, helping to combat stress and depression.

    Latest and Breaking News on NDTV

    Photo Credit: iStock

    What Is The Best Time To Eat Spicy Food?

    Now that we’ve covered its benefits, let’s talk about timing. While you might think you can eat spicy food whenever you want, it actually depends on your body’s state. Ayurvedic health coach Dimple Jangda explains that if you have a Kapha imbalance (e.g., cold, cough, sinus issues, allergies, obesity, or sluggish metabolism), spicy food can be beneficial. Capsaicin increases stomach acid production, raises body temperature, and liquefies mucus, helping alleviate these symptoms.

    Who Should Avoid Spicy Food?

    You might assume that those without these issues can safely enjoy spicy food, but that’s not always true. If you have acidity, reflux, GERD, a burning sensation, or a Pitta imbalance, Jangda advises avoiding spicy food. The intensity of spices can aggravate these conditions, prolong discomfort, and worsen symptoms.

    Latest and Breaking News on NDTV

    Can Spicy Food Affect Sleep At Night?

    Yes! Spicy food can impact your sleep. Ayurvedic expert Ashutosh Gautam notes that while eating spicy food at dinner isn’t inherently bad, it’s crucial to allow enough time between dinner and bedtime. Why? Spicy food may cause gastric disturbances, indigestion, and restlessness, disrupting your sleep. So, don’t hit the bed right after devouring hot ramen noodles!

    Watch the full video below:

    Also Read:4 Effective Remedies To Cool Your Mouth After Eating Spicy Food

    What’s your favourite spicy food? Let us know in the comments below!


    Source link

  • The Secret Ingredient To Yummy Spicy Food: Crispy Chili Garlic Oil

    The Secret Ingredient To Yummy Spicy Food: Crispy Chili Garlic Oil

    If you’re a fan of spicy food, Crispy Chili Garlic Oil is a must-have condiment in your kitchen. This versatile oil can enhance the flavour of almost all your favourite dishes, from momos and pizza to pasta and garlic bread. With its bold combination of chilli flakes, garlic, and aromatic spices, this oil adds a spicy kick to a variety of foods. It’s incredibly easy to make, can be stored for months, and is a great addition to any spice lover’s pantry.

    This versatile condiment is of great use if you keep making all the dishes it can be added to. The recipe for this oil was shared by chef Pooja Munjani on her Instagram handle. Are you excited to make it yourself? Here is the recipe for you.

    How To Make Crispy Chilli Garlic Oil I Crispy Chilli Garlic Oil Recipe:

    1. Combine Dry Ingredients: Start by placing chilli flakes in a bowl. Add salt and sugar powder, and mix well to ensure even distribution.
    2. Fry Spices: Heat neutral or olive oil in a deep pan. Add chopped garlic, cinnamon, black cardamom, cloves, black pepper, star anise, fresh coriander, onions, and ginger. Fry until fragrant and slightly browned.
    3. Remove Spices: Carefully remove the fried spices from the oil and set aside.
    4. Fry Garlic and Sesame Seeds: In the same oil, fry chopped garlic and sesame seeds until golden brown.
    5. Combine with Chili Flakes: Pour the hot oil over the chilli flakes, salt, and sugar mixture. Stir vigorously to coat the chilli flakes with the oil.
    6. Let it Cool: Allow the oil to cool completely before transferring it to a clean, airtight container.

    Watch the complete recipe video for chilli garlic oil here:

    Tips for the Perfect Crispy Chili Garlic Oil:

    • Choose the Right Chili Flakes: For a milder flavour, use a combination of dried red chilli flakes and chilli powder. For a spicier oil, opt for pure chilli flakes.
    • Neutral Oil: Using a neutral oil like vegetable oil or canola oil will help prevent the oil from overpowering the flavour of the spices.
    • Storage: Store the oil in a cool, dark place. It can be stored for several months.
    • Adjust the Flavor: If you prefer a sweeter oil, add more sugar. For a more savoury flavour, add a bit more salt.

    Once your Crispy Chili Garlic Oil is ready, you can use it to add a kick of flavour to your favourite dishes. Drizzle it over momos, pizza, or pasta, or use it as a spread for garlic bread. You can also use it as a marinade for meat or poultry. The possibilities are endless!

    So why not give it a try and enjoy a hot, spicy meal? 

    About Neha GroverLove for reading roused her writing instincts. Neha is guilty of having a deep-set fixation with anything caffeinated. When she is not pouring out her nest of thoughts onto the screen, you can see her reading while sipping on coffee.


    Source link

  • How To Make Andhra Karam Podi : A Spicy Masala To Make Your Food Flavourful

    How To Make Andhra Karam Podi : A Spicy Masala To Make Your Food Flavourful

    Idli, dosa, vada and more – South Indian food defines the epitome of comfort in every possible way. It is subtle yet rich in taste and fulfils you to the core at any given time. What makes the cuisine more palatable are the various types of chutneys served along. In fact, you would be fascinated to know that each Southern region has their unique chutney recipes, served alongside the food. One such popular option is podi – meaning ‘masala’. Whenever you visit a South Indian restaurant, you will find podi being served along with your dosas and idlis, but the taste differs from place to place. Wonder why? It is because of the uniqueness of the concoction as per region.

    We recently came across one such version of podi that includes the zing of red chillies and garlic. It’s the Andhra-style karam podi. While the masala is easily available at stores and e-commerce platforms, you can also make it at home with some basic ingredients.

    Also Read: No Time? No Problem! These 10-Min South Indian Recipes Are Your Saviour

    What Is So Special About Andhra Karam Podi?

    This podi is brownish and includes the husk of black urad dal, ground along with other ingredients including curry leaves, garlic, peanuts and more. Some popular variations of karam podi include nalla karam podi (garlic karam podi), palli karam podi (peanut karam podi), kobbari karam podi (coconut karam podi) and more.

    Karam podi is spicy, and zingy and also benefits health in multiple ways. Thanks to ingredients like peanuts and dal, the masala is packed with protein, fibre and various essential minerals, which may help have anti-inflammatory effects on your body.

    Also Read: 10 Homemade Masala Recipes that Will Make Your Cooking Flavoursome!

    Latest and Breaking News on NDTV

    Homemade Andhra Karam Podi Recipe: How To Make Andhra Karam Podi At Home?

    The recipe is super simple and super spicy. All you need to do is get hold of some good quality red chillis, Bydagi or Kashmiri red chilli for colour, garlic, urad dal, chana dal, salt and oil. You can also add coconut, curry leaves, peanuts, red dal, coriander seeds etc to enhance the flavours of the dish.

    Step 1. Heat oil in a pan and fry the red chillies.

    Step 2. Heat some more oil and fry the garlic, urad dal, and chana dal.

    Step 3. Blend red chillies in the mixer grinder.

    Step 4. Add the rest of the ingredients, along with salt, and mix again.

    Step 5. Store in an airtight container, in a cool and dry place.

    That’s it. You have a fresh batch of Andhra Karam Podi ready to be relished with idli, dosa and even ghee rice. Click here for the detailed recipe.

    Source link

  • Rasam Maggi: This Delicious Mix Of Spicy Masala And Instant Noodles Is A Must-Try

    Rasam Maggi: This Delicious Mix Of Spicy Masala And Instant Noodles Is A Must-Try

    Picture this: you are sitting on a window sill as it pours like cats and dogs outside. While enjoying this weather, you are slurping your favourite 2-minute noodles – Maggi! Yes, Maggi is the first thing that comes to our mind when it’s raining and we crave something hot and comforting. The spicy kick of the masalas combined with soft, slurpy noodles is a combination that no other dish can beat. This is what makes it a beloved dish all over India. Thanks to its versatility, nowadays we find several unique recipes that amp up the taste of these noodles. From Manchurian Maggi to Punjabi tadka Maggi, the list is endless. Joining this bandwagon is another unique recipe that combines the flavours of these noodles with the tangy essence of tomatoes – we are talking about Rasam Maggi! Yes, you read that right! This unique Maggie recipe is perfect for those who love to experiment with taste and can’t get enough of South Indian flavours. Intrigued? Well, you should be! Try this deliciously unique recipe before monsoon bids farewell. But before we jump to the recipe, let’s discuss some questions related to the recipe.

    Also Read: These Maggi Pakodas From Ahmedabad Are The New Twist To Maggi (Recipe Inside)

    Latest and Breaking News on NDTV

    What Makes Rasam Maggi So Special?

    This Maggi recipe is perfect for people who love to experiment with flavours. The zesty broth, made with freshly roasted spices and tomatoes, gives Maggi a delightful twist that pairs perfectly with the soft, slurpy noodles. The best part about this recipe is that it is extremely versatile and easy to make, so even if you are a newbie in the kitchen, you can enjoy the flavours of this unique recipe. Whether enjoyed alone on a rainy day or shared with friends and family, rasam Maggi offers a blast of flavours that turns the ordinary into the extraordinary.

    How To Ensure That Your Rasam Maggi Doesn’t Turn Soggy?

    To ensure that your rasam Maggi doesn’t turn soggy and clumpy, make sure only to boil the noodles to 80 per cent. This is because after you transfer the noodles to the masala mixture, it will absorb the flavours and cook completely in it. Also, make sure to mix the boiled noodles gently in the rasam mixture so that you don’t break the noodles. Let the flavours infuse in the masala mixture and noodles for a delightful blend of tangy flavours.

    Rasam Maggi Recipe | How To Make Rasam Maggi At Home

    Making rasam maggi at home is pretty simple. This recipe was shared by digital creator @bhukkadintown on Instagram. To make this:

    1. Prepare Rasam Powder

    Heat a tawa and dry roast cumin seeds, black pepper, chopped garlic pods, and curry leaves in a pan. Once done, let it cool and then grind it into a fine powder using a blender or mortar and pestle.

    2. Boil Noodles

    In a pan, boil some water and cook Maggi noodles as per the packet instructions. Drain the water and set it aside.

    3. Prepare Tempering

    In the same pan, heat some oil and add mustard seeds. Allow them to splutter. Then add cumin seeds, asafoetida, and curry leaves. Saute for a minute until aromatic. 

    4. Add Other Ingredients

    To this mixture, add crushed tomatoes, turmeric powder, homemade rasam powder, Maggi masala, and salt. Mix well and pour in water. Bring the mixture to a boil and let it simmer for 10-15 minutes.

    5. Add Noodles

    Once the masala is prepared, add cooked Maggi noodles to the rasam mixture. Mix well and let it simmer for a few more minutes so that the noodles absorb the flavours.

    6. Garnish

    Garnish the cooked noodles with chopped coriander leaves, grated coconut, and a dash of Podi masala. Serve hot!

    Bonus Tip:

    If you want to increase the protein content of these noodles, crack in one egg and add shredded boiled chicken pieces! (Thank us later!)

    Watch the full video below:

    Also Read: Watch: Maggi With A Chilli Garlic Twist Leaves Internet Impressed

    So, try this unique Maggi recipe today and let us know in the comments below how you like its taste!


    Source link